


To heal what ails you, go with your gut.
Integrative- and functional-medicine practitioners have long taken a gut-centric approach to treating illnesses of all kinds. Now, mainstream medicine is beginning to recognize the wisdom of that approach, too.
Me, I had to learn it the hard way. For nearly a decade, I lived completely “fat free.” Years of playing college soccer taxed my body to the brink, and the effects of “replenishing” with bagels, pasta, cereal, and Butter Buds took its toll — particularly on my digestive health.
Eventually, thanks in large part to Natasha Campbell-McBride’s Gut and Psychology Syndrome (GAPS) nutritional protocol, I got better. But first I had to understand what was going wrong.
The acronym GAPS also stands for Gut and Physiology Syndrome. Both meanings refer to a gamut of physical and neurological disorders that mainstream medicine often struggles to manage, let alone cure.
Campbell-McBride, MD, author of Gut and Psychology Syndrome: Natural Treatment for Autism, ADHD/ADD, Dyslexia, Dyspraxia, Depression, and Schizophrenia, holds degrees in neurology and nutrition. And in her book she explains how all of these problems can be connected.
It turns out that abnormal gut flora and other irritants can lead to a condition known as “leaky gut.” This leads to pathogenic microbes being absorbed into the bloodstream. From there, they can spread throughout the body, interfere with normal biological processes, release toxins, and cause disease. (For more on leaky gut syndrome, check out “How to Heal a Leaky Gut“.)
The healing protocol Campbell-McBride developed has two phases. The GAPS Introduction Diet, designed to be followed for up to a month, removes all foods that might be gut irritants from your daily intake (see “The GAPS Introduction Diet,” below).
The second phase, called the Full GAPS Diet, is intended to be followed for at least two years by those with significant health concerns. It includes a wide selection of nutrient-dense foods that can be prepared simply and are easy to digest.
I coauthored The Heal Your Gut Cookbook with my friend Mary G. Brackett to help people more fully enjoy and benefit from both phases of their GAPS experience, and to improve their gut health overall. But whether or not you decide to try a GAPS Diet, the recipes we’ve gathered here (selected from our book) are designed to be consistent with GAPS principles, to be kind to your gut, and to support general health. They are appropriate for anyone intent on eating more whole, nutritious foods.
The GAPS Introduction Diet
The GAPS Introduction Diet, developed by Natasha Campbell-McBride, MD, is designed to restore the bacterial balance in your gut. While the Full GAPS Diet represents long-term dietary change, the GAPS Introduction Diet described below lasts between 18 and 30 days (three to five days per stage). If the intro diet brings you relief, it’s a good indicator that your gut health could use ongoing support.
- Stage One: It’s all about soup. When properly prepared from nutrient-dense meat stock, soup provides an easy-to-digest, nourishing meal that begins to heal your gut wall. The proteins in meat stock are already partially broken down, giving your body a chance to rest while reaping the benefits of the stock’s powers.
- Stage Two: Add organic raw egg yolks to your soups, which you can further round out with more meats and vegetables. Be sure to eat plenty of animal fats; they are the key to recovery and will help keep you satiated.
- Stage Three: You can add avocado at this stage, as well as onion sautéed in lots of animal fat, since it’s great for digestion and immunity. Introduce therapeutic probiotics on an empty stomach now, preferably 20 minutes before eating.
- Stage Four Burgers! Stage four includes burgers with garlic aioli and caramelized onions, and burgers with garlicky mushrooms, as well as roasted chicken and fish (try this Belly-Friendly Burger recipe). You can also start juicing — a time-honored tradition for removing toxins from your body and a surefire way to pack a lot of nutrition into one punch.
- Stage Five At this point you can introduce spices, as well as soft lettuces, raw vegetables, and apples cooked in ghee or coconut oil.
- Stage Six Now you can introduce GAPS-friendly desserts, including coconut macaroons, lemon curd, and cinnamon-apple bake, as well as raw, peeled apples and other raw fruits.
Stock vs. Broth
Meat stock is the foundation of the GAPS Introduction Diet, while bone broth is introduced in the Full GAPS Diet. What’s the difference? Here’s an overview.
|
Made From |
Cooking Time |
Uses |
Healing Benefits |
|
|
Meat Stock |
Pieces of meat that have a joint in them, such as turkey legs or thighs, or a beef or lamb shank. |
Up to three hours for poultry, and up to eight hours for beef, bison, or lamb. (Basic Meat Stock recipe below.)
|
Meat stock is milder in flavor than broth. In the GAPS Introduction Diet, eat the meat, the cartilage, or tendons, as well as the vegetables, and drink the stock.
|
Gelatin (found in the joints and knuckles of bones) protects and heals the mucosal lining of the digestive tract and helps to regenerate cells. It also aids in the digestion and absorption of nutrients.
|
|
Bone Broth |
Bones that have a little bit of meat on them, such as chicken carcasses, or beef marrow and knuckle bones. |
Six to 24 hours for poultry, and 24 to 72 hours for beef or other livestock. (See Homemade Beef Bone Broth recipe further down.)
|
Bone broth makes nutritious soups, stews, and casseroles, or can be enjoyed as a drink throughout the day. | Marrow (found in larger bones such as the femur) helps to strengthen bones and connective tissues and supports the immune system. Also promotes the development and repair of healthy joints, ligaments, tendons, and bones, as well as hair and skin.
|
Download the Stock vs. Broth PDF.
Basic Meat Stock
Meat stock has a different amino-acid profile than bone broth (see chart above), making stock easier on your gut. It also supports brain function, which can be negatively affected in those who suffer from gut-health challenges.
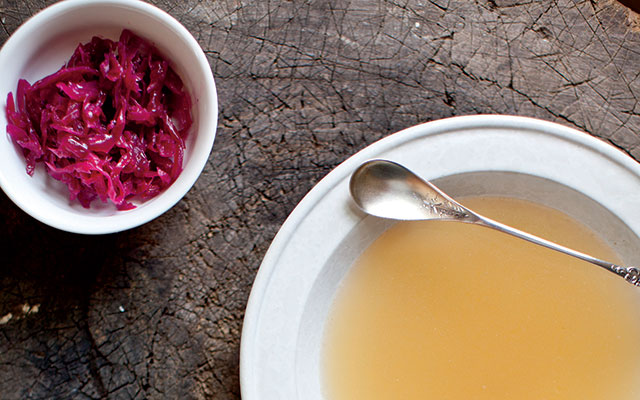
Makes four servings | Prep time 3 to 10 hours
- 2 to 3 pounds turkey or chicken thighs or quarters, skin on, or 2 to 3 pounds grassfed beef, bison, or lamb shanks
- 3 to 4 carrots, coarsely chopped
- 1 small onion, quartered
- 3 to 4 celery ribs, chopped
- Handful of black peppercorns
- 1 to 2 tsp. sea salt
- 2 to 3 sprigs fresh rosemary or thyme
- 2 to 4 tbs. tomato paste (optional)
- 2 to 4 garlic cloves, to finish
Directions
- Preheat oven to 350 degrees F.
- Place all of the ingredients except the garlic in a 5- to 6-quart Dutch oven or Crock-Pot.
- Cover with water, to 2 inches above ingredients.
- Cook poultry in oven for up to 3 hours or in a Crock-Pot on low for 6 to 8 hours. Cook red meat in oven for 6 to 8 hours or in a Crock-Pot on low for 8 to 10 hours.
- Serve the meat and vegetables with a cup of stock alongside. Use a garlic press to add a small clove of garlic to each cup of stock, along with some good sea salt.
Raw Kale Salad
By massaging the kale, you help break down some of the rigid plant-cell structure, which can be irritating to the gut when eaten raw. This also helps diminish the bitterness and toughness of the leaves.
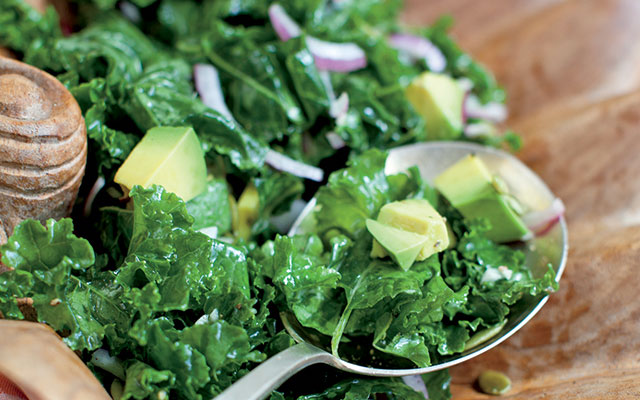
Makes four to six servings | Prep time 15 minutes
- 1 head curly or lacinato kale
- 2 tbs. olive oil
- Juice of 1 lemon
- 1 tbs. apple cider vinegar
- 1/4 cup crispy pumpkin seeds
- 1/2 red onion, thinly sliced
- 1 avocado, diced
- Sea salt and pepper
Directions
- Tear off the kale leaves and discard the stems. Chop the leaves into bite-sized pieces, and toss in a bowl with the olive oil.
- Massage the kale for five minutes; the greens will wilt a bit and turn a darker green.
- Adjust the acidity with a squeeze of lemon.
- Add the other ingredients, and you’re all set. No additional dressing is required. This salad will stay fresh in the fridge for a few days, and it will get easier to digest the longer it marinates.
Celery Root Soup With Garlic Mushrooms
Garnish this nourishing soup with mushrooms sautéed in garlic, or simply add the mushrooms after you’ve puréed the other ingredients.
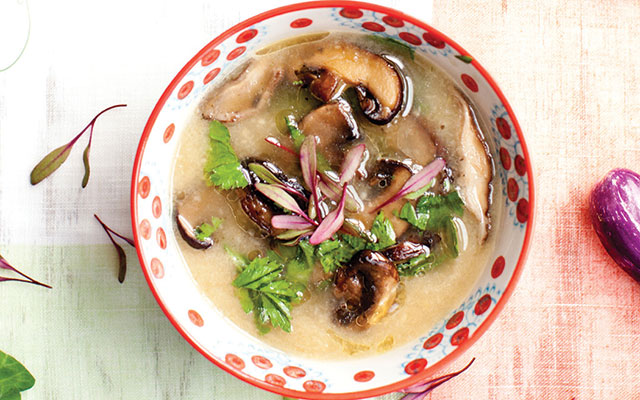
Makes six to eight servings | Prep time 50 minutes
- 2 quarts chicken stock
- 4 to 5 tbs. animal fat, coconut oil, or ghee
- 2 onions, chopped
- 2 celery roots, peeled and cubed
- 2 leeks, washed and sliced
- 1 fennel bulb, chopped
- Sea salt
- 1 to 2 pounds mushrooms
- 2 garlic cloves, pressed or chopped finely
Directions
- Bring the stock to a boil in a soup pot, skim, and discard any scum.
- Add 2 to 3 tablespoons of fat and bring to a simmer.
- Add the onions, celery, leeks, and fennel, and continue to simmer, covered, until soft, about 20 minutes.
- Purée the soup with an immersion blender, and add salt to taste.
- Clean the mushrooms with a damp dish towel to remove any dirt. Remove the stems and slice.
- Put 2 tablespoons of fat in a frying pan, and add the mushrooms with a pinch of salt.
- Sauté for about 10 minutes, add the garlic, and continue to cook on low for another five to 10 minutes.
- Garnish the soup with the sautéed mushroom.
Butternut Squash and Swiss Chard Lasagna
This pasta-free, gluten-free lasagna is soothing to the gut. Feel free to substitute kale for the chard, or use a mixture of the two. You can also make it without the sausage if you prefer to serve it as a lighter side with a meat or fish dish. This one takes some assembly time, but it’s worth it. You can scale this recipe up by 50 percent — great for when you’re serving a crowd.
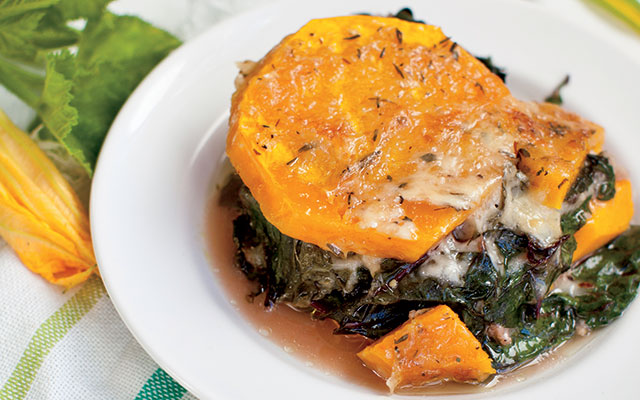
Makes six to eight entrée servings, or 10 to 12 side-dish servings |
Prep time 30 minutes | Cook time 60 minutes
- 1 large or 2 small butternut squashes, peeled, seeded, and sliced 1/8 inch thick
- Sea salt and pepper to taste
- 3 tbs. butter, cut into pieces, or fat of choice
- 1 or 2 large bunches Swiss chard, chopped (leave out stems, if you wish)
- 1 to 2 cups cooked ground sausage
- 2 to 3 tbs. dried thyme
- 1 1/2 to 2 cups grated cheddar (optional), divided
- 1 to 2 cups chicken broth
- 1/2 cup grated Parmesan (optional)
Directions
- Preheat oven to 350 degrees F. Grease a 9-x-13-inch baking dish.
- Layer a third of the squash slices on the bottom of the pan; season with salt, pepper, and a little chopped butter.
- Top with half the chard; add a layer of sausage, a big pinch of thyme, and more salt, pepper, and butter.
- Add a third of the cheddar. Top with half of the remaining squash, then all the remaining chard, salt, pepper, butter, and thyme, and another layer of sausage.
- Add half the remaining cheddar, then finish with the last of the squash.
- Carefully pour the broth over the dish.
- Cover tightly with foil, and bake for 60 minutes.
- Remove from oven, and take off the foil.
- Top the lasagna with the remaining cheeses. Broil until the cheese is melted and golden.
Homemade Beef Bone Broth
Bone broth can be made from beef, chicken, fish, lamb, turkey, bison, or venison. It’s made from bones with a little bit of meat on them, which you cook longer than you would a meat stock. Prepare a large quantity of broth at a time and use it to make healthy soups, stews, and casseroles, or simply to drink throughout the day as a beverage.
Makes 12 to 16 servings | Prep time 25 to 72 hours
- 3 to 4 lbs. beef marrow and knuckle bones
- 2 lbs. meaty bones, such as short ribs
- 1/2 cup raw apple cider vinegar
- 4 qts. filtered water
- 3 celery stalks, halved
- 3 carrots, halved
- 3 onions, quartered
- Handful of fresh parsley
- Sea salt to taste
Directions
- Place the bones in a stockpot, add the apple cider vinegar and water (add more water if needed to cover the bones), and let the mixture sit for one hour so the vinegar can leach the minerals out of the bones.
- Add the vegetables, bring to a boil, and skim any scum from the top and discard.
- Reduce to a low simmer, cover, and cook for 24 to 72 hours.
- During the last 10 minutes of cooking, throw in a handful of fresh parsley for added flavor and minerals. Let the broth cool and strain it, making sure all the marrow is pulled out of the marrow bones and into the broth. Add sea salt to taste.
- Drink the broth as is or store it in the fridge (up to five to seven days) or freezer (up to six months) for use in soups and stews.
Natural Nutty Energy Bars
This recipe is a healthy good-fat variation on those weird engineered bars (which unfortunately are now all over grocery-store shelves). It makes a delicious, nutrient-dense snack — on the go, in school lunches, or as an after-meal treat.
Makes 15 to 20 servings | Prep time 45 minutes
- 2 1/2 cups sprouted nuts (use a variety, like walnuts, cashews, and pecans) (recipe follows)
- 1 1/2 cups sprouted seeds (use a variety, like sesame, sunflower, and pumpkin) (recipe follows)
- 1/2 cup chia seeds (optional)
- 1 cup shredded unsweetened coconut or coconut flakes
- 1 tsp. cinnamon (optional)
- 1/2 tsp. sea salt, plus a pinch
- 1/2 cup coconut oil
- 1/4 to 1/2 cup raw honey, or 6 dates, soaked and puréed
- 2 tsp. vanilla extract
- Homemade Chocolate Sauce (recipe follows) (optional)
Directions
- Place the nuts, seeds, chia, shredded coconut, cinnamon, and 1/2 teaspoon sea salt in a food processor, and pulse to a coarse consistency. Depending on your preference, you can process to a finer consistency.
- Place a saucepan over medium-low heat, and slowly melt the coconut oil.
- Turn off the heat, and add the honey (or dates), a pinch of salt, and vanilla. Add the shredded coconut mixture to the pot, and mix in.
- Pour into a parchment-lined or well-greased 9-x-13-inch cake pan.
- Grease your hands with a little coconut oil, and press the mixture evenly into the pan. Drizzle with Homemade Chocolate Sauce, if you like.
- Cool in the fridge for 30 minutes to one hour. Cut into bars and serve.
Homemade Chocolate Sauce
Makes 1/2 cup | Prep time 5 minutes
- 2 to 3 tbs. coconut oil
- 1 bar unsweetened dark chocolate
- Pinch of sea salt
- 1 tbs. honey (optional)
Directions
Melt the ingredients together in a saucepan over low heat. Store in a glass container.
Sprouted Seeds and Nuts
Sprouted nuts and seeds are easy on the gut. You can either buy them at most stores or make your own with the following recipe.
- Place 1/2 to 1 cup raw seeds or nuts in a clean, quart-sized Mason jar. (Note: you’ll need to prepare 4 to 5 jars for the recipe above.)
- Fill with filtered water to 2 inches above the top of the seeds or nuts.
- Cover the jar with cheesecloth held by a rubber band, and let it sit overnight for 10 hours in a cool place.
- Drain the seeds or nuts, rinse, and drain again. Replace the cheesecloth, then invert the jar and position it at an angle in a measuring cup or bowl. This will allow air to circulate and water to continue draining.
- Rinse the seeds or nuts every 12 hours, and repeat the process until sprouting begins — about two days.
- Pour the sprouted seeds or nuts onto a plate or cookie sheet, and let them dry completely.
- Store them in a dry jar, covered, in the fridge.
Recipes adapted from Hilary Boynton and Mary G. Brackett’s The Heal Your Gut Cookbook and printed with permission from Chelsea Green Publishing.
This article originally appeared as “Healing Meals” in the December 2021 issue of Experience Life.


Comments (1)
I’ve wanted such a recipe for a while. I also appreciate the sprouting directions. Thank you.