


The classic exercises we learned in grade school gym class – sit-ups, pushups and squats – introduced most of us to the world of fitness. Unfortunately, the sloppy techniques most of us acquired in our youth never really did these exercise basics true justice. And practiced improperly over time, such exercises not only fail to deliver the excellent results they could, they can even contribute to injuries.
This infuriates Pavel Tsatsouline (www.powerbypavel.com), author of The Naked Warrior: Master the Secrets of the Super-Strong – Using Bodyweight Exercises Only and several other books that preach a “low tech/high concept” approach to fitness. The former Soviet special forces instructor, now an athletic trainer, says that most people do these three basic exercises incorrectly “probably 99 percent of the time.”
The beauty of Tsatsouline’s method is its exacting simplicity. He focuses on slow movements and proper technique – but he also sprinkles in his secret fitness formulas, such as tensing muscles you wouldn’t normally consider necessary for the exercise as a means for radiating strength throughout the body. Tsatsouline emphasizes quality over quantity: low repetitions against high resistance, with full recovery. And you’ll want the recovery time. With just a few diabolical adjustments, the trainer affectionately dubbed the “Evil Russian” renders your basic sit-up, pushup or squat tougher than you would have ever thought possible. But here’s the good part: Once you’ve mastered the basics, you’ve got a workout you can do flawlessly, anywhere, anytime. Of course, perfection takes practice. So let’s get started.
Sit-Ups
There’s a reason why core strength is a core fitness component. The abdominal muscles stabilize your midsection and act as a platform for the rest of your body’s movements. In other words, powerful abs make for a powerful body.
A strong core also protects your back from injury and transfers strength from one limb to another through what Russian hand-to-hand combat instructors call “summation and wave.” The fighter initiates movement from the core and passes it along the body with every muscle, adding force until it culminates in a powerful blow. This same principle also applies to more peaceful activities.
“When you throw a ball, you have to use your legs,” says Tsatsouline. “If your stomach is Jell-O, you can’t effectively pass on your momentum from your lower body to your upper body. You’ve got to learn to pass the energy from limb to limb with minimal losses. A solid core makes you stronger in anything that you do.”
Common Sit-Up Mistakes
Most people make two mistakes with their sit-ups: ineffective technique and too many reps.
The bent-leg sit-up is the industry standard for strengthening the abdominals – and it’s completely wrong, says Tsatsouline. “It’s just a way to get yourself bored and hurt.”
These conventional sit-ups done by the “crunch generation,” says Tsatsouline, fail to isolate the very muscles they’re supposed to strengthen. Instead, they engage (and over time, tighten up) the hip flexors, the muscles at the front of your hip that allow you to lift your thigh. Oftentimes, the hip flexors are already tight because we spend so much time sitting or doing repetitive-motion exercises like cycling or running. (For information about how to loosen tight hip flexors, see “Office Imbalance“.)
When we huff and puff through high repetitions, our abdominals tend to pass some of the load to the hip flexors. One such hip-flexor muscle is the psoas, which runs from the top of the femur to the bottom of the lumbar spine. As a result, we essentially end up hoisting ourselves up by the lower back.
The result is back strain, jerky movements and limited benefits for your abs. Worse, people tend to assume more is better and hammer out dozens of reps with these faulty techniques.
Mistake No. 1:
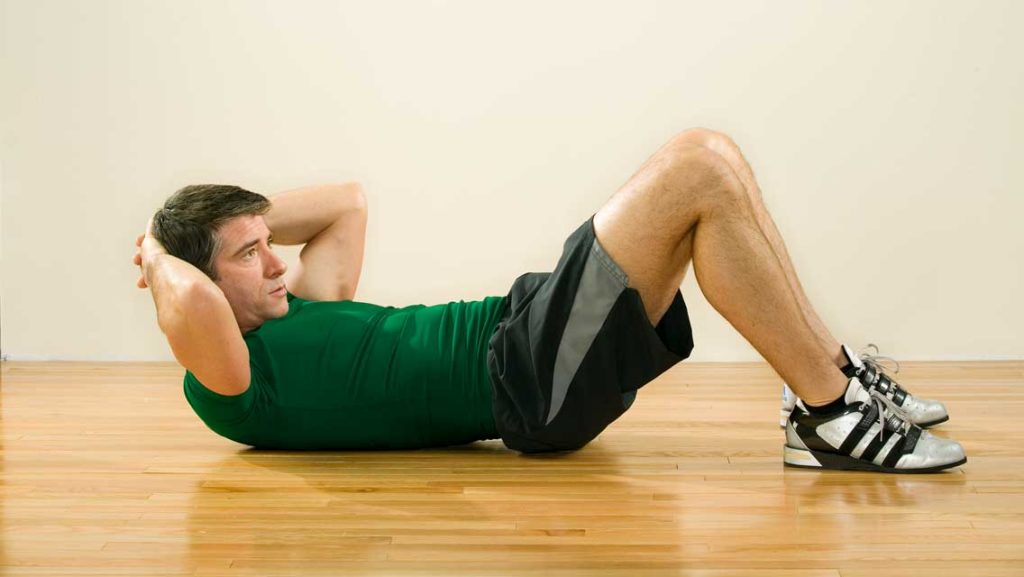
- Pooched-out abs. Instead, tense your abs, amplifying the intensity of your muscle contractions. Also, keep your lower back on the floor.
Mistake No. 2:
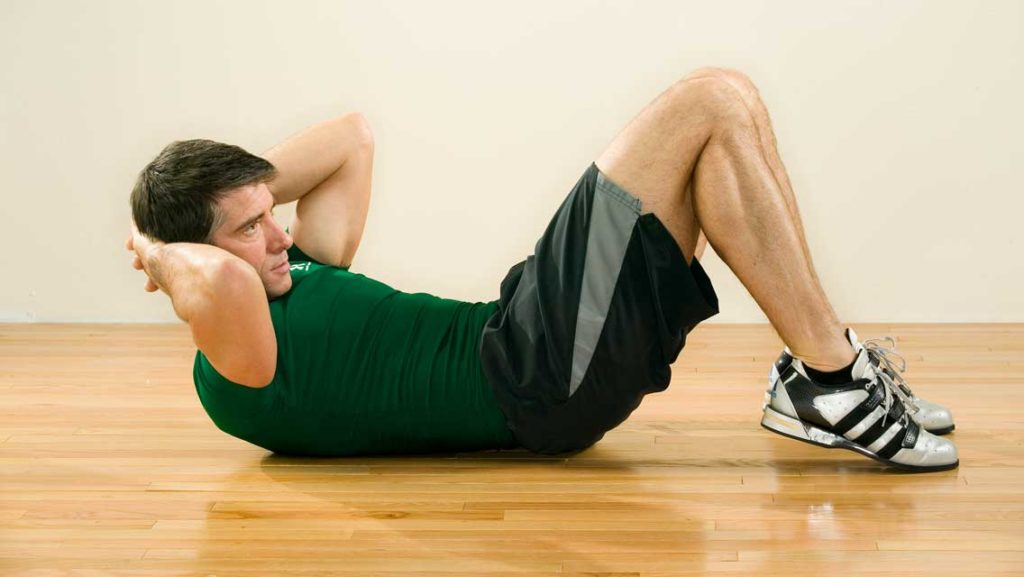
- Sucked-in abs are just as weak. Tsatsouline stresses a tight, flat core, one that’s “full of compressed energy.”
Mistake No. 3:
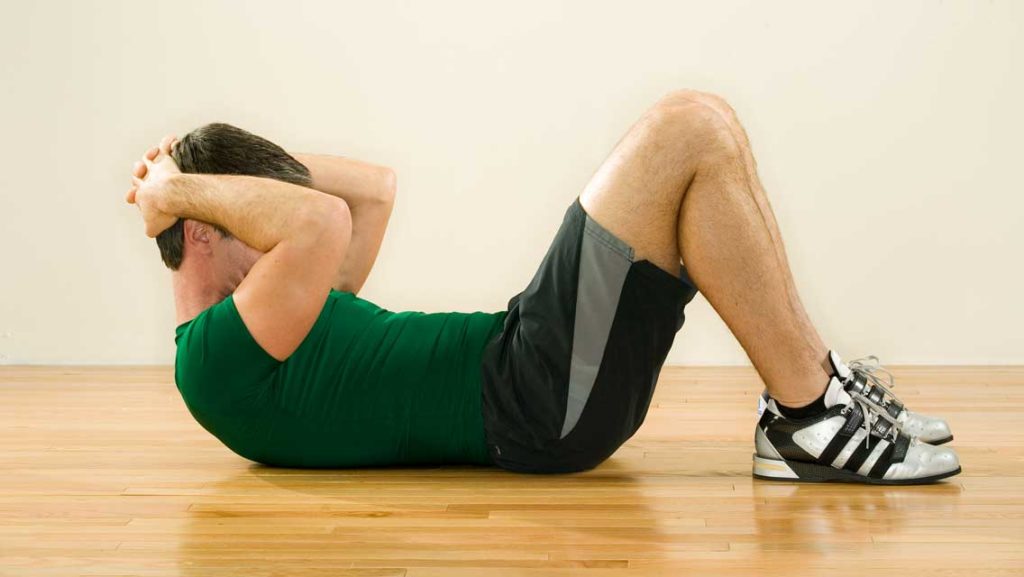
- Yanking on your head during an ab exercise; it places strain on your neck.
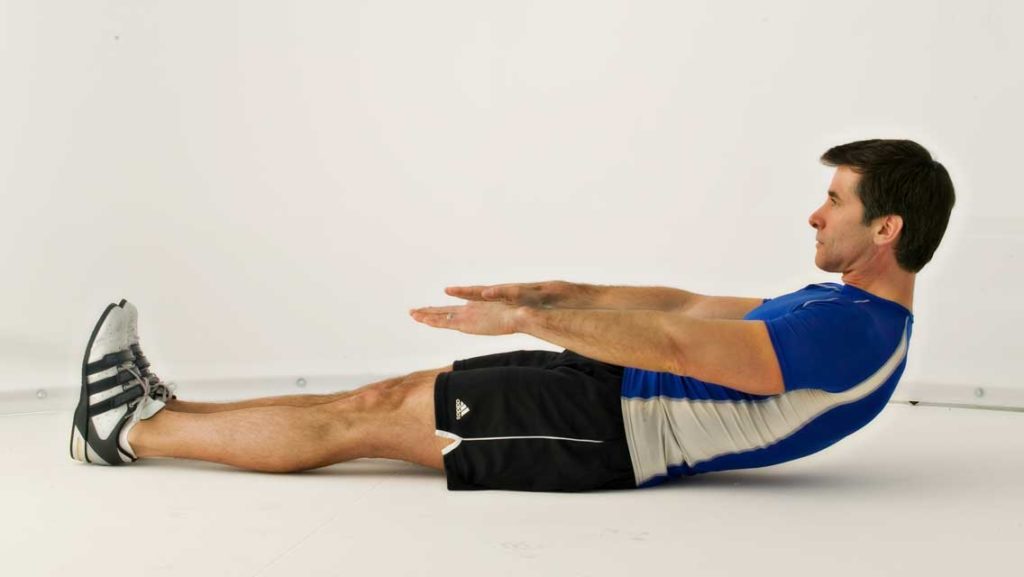
Pavel Tsatsouline Sit-Up
Done properly and without momentum, says Tsatsouline, the straight-legged sit-up is more effective than a traditional sit-up because it prevents your hip flexors from tightening up. As a result, the exercise more intensely works your abdominals, not your hip flexors.
Tsatsouline recommends doing just five reps at a time, adding that if you focus on contracting your ab and glute muscles as hard as possible the entire time, you will not want to do more than five. The principle of quality over quantity is a common theme in his program. “You can get extremely strong in your abs never doing more than five reps – ever,” he says. “You’re using a challenging exercise, and you’re not wasting time.”
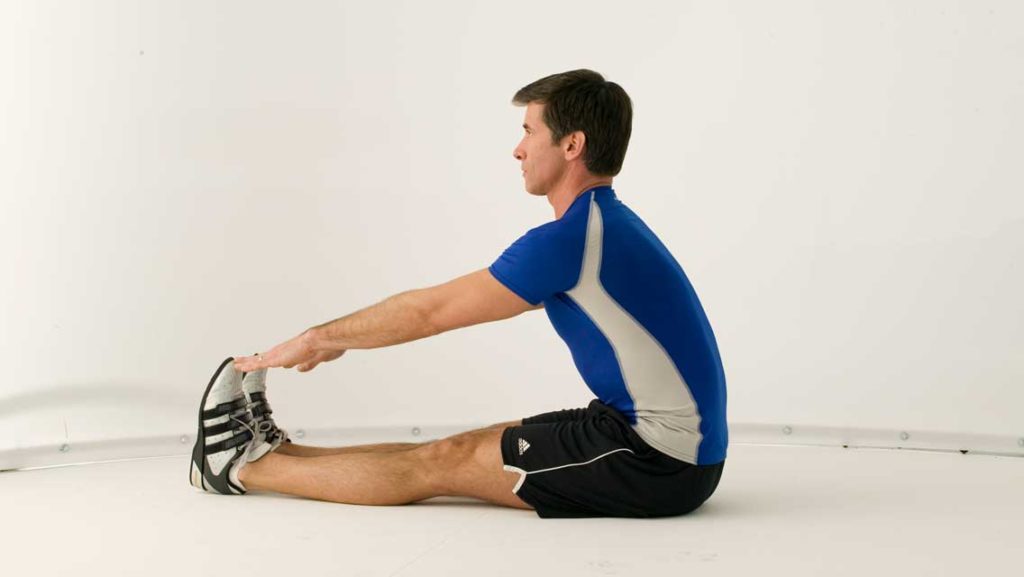
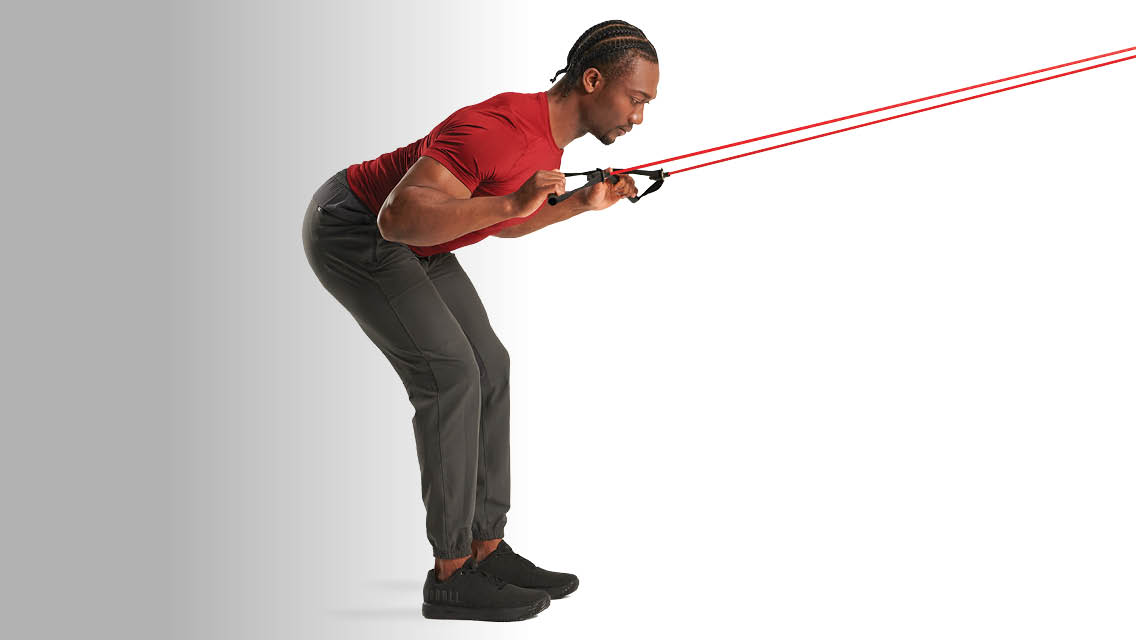
As you begin to master this technique, make it more challenging by holding a weight to your chest or by using elastic bands attached to the wall behind you. You also can reach forward toward your toes to improve flexibility.
Another alternative to the conventional sit-up is the Janda sit-up, which requires a partner. This type isolates the abdominal muscles and reduces lower-back stress by employing the concept of reciprocal inhibition: As one muscle group contracts, the opposing muscle group relaxes.
Before performing the sit-up, ask your partner to hold the back of your calves firmly. Then, pull your calves against his or her hands, activating your glutes and hamstring muscles and thereby relaxing the opposing muscle group, the hip flexors.
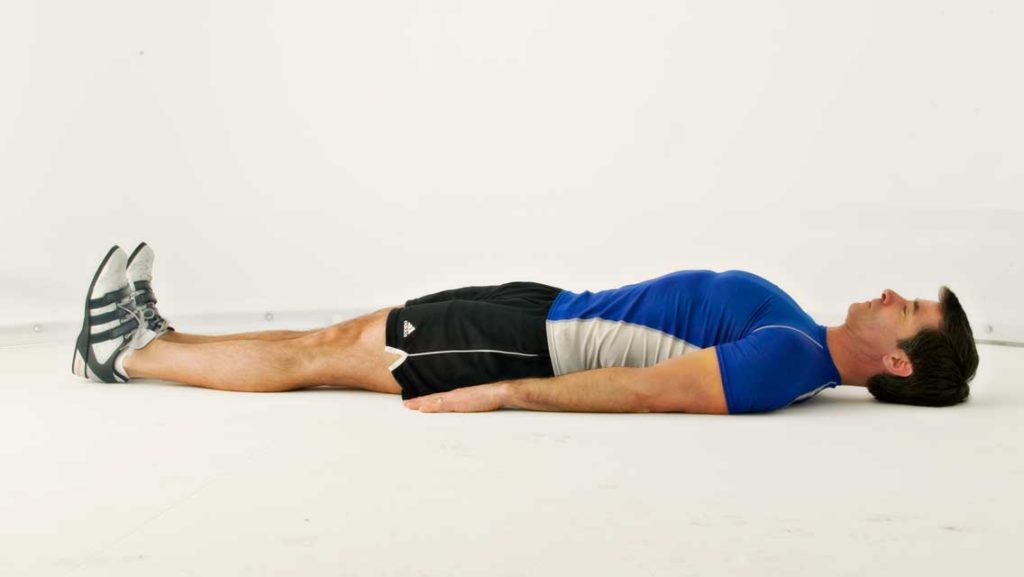
1. To begin, lie on your back with legs straight. Keep your hands alongside your body as if you were reaching for your feet.
2. Take a breath in, squeeze the glute muscles in your butt and sit up slowly, curling your torso toward your toes. Don’t try to keep your spine perfectly straight — this will place too much pressure on your lower back.
3. Complete the exercise by sitting upright, spine straight, abs still tensed and powerful.

4. To add a hamstring flexibility component, reach slowly toward your toes, still keeping your legs straight.
Awareness
Move very slowly and concentrate on proper technique. Take a breath, tense your glutes, and focus on isolating your abdominals and using them to lift your torso. This should feel noticeably harder than a bent-leg sit-up. Your hip flexors should remain relaxed – a sign that they’re not carrying the load. Avoid craning your head forward. “Focus on really intense contractions in your abdominal muscles rather than lots of repetitions,” Tsatsouline stresses.
(See “How to Create a Strong Core” to learn how posture, breathing, and coordination can make your center more stable and solid.)
Squats
Though notorious for their ability to cause injury if done improperly, squats are not only a safe full-body “pure-strength” lift, they are also terrific for joint mobility and function, says Tsatsouline. In fact, he devotes much of his book The Naked Warrior to teaching his readers to do one-legged squats, or “pistols.” Once you master the following technique, you can increase its difficulty by trying the single-legged version.
Common Squat Mistakes
Many people make the mistake of rolling onto their toes and letting their knees drop in front of their feet when doing squats. This technique can strain the knees and is a major reason squats have been wrongly deemed risky.
People also tend to look down, causing their back to round, or they let their knees bow inward (or, more rarely, outward), which places excessive load on the joints. And many of us make recognizing our form faults more difficult by wearing too-cushy shoes. “There are special mechanoreceptors on your feet that sense the pressure of the ground and then activate different muscles,” says Tsatsouline. “When you can’t feel pressure on certain parts of your foot, certain muscles will not fire, and sooner or later, you’re going to have problems with your joints.”
Tsatsouline recommends wearing thin-soled shoes so you can feel the ground, rather than cushy running shoes, which can inhibit good mechanics. “God designed your feet in the best way,” he says. “They function well, and you don’t need to fake it with fancy shoes. The simpler you keep things, the better off you are going to be.”
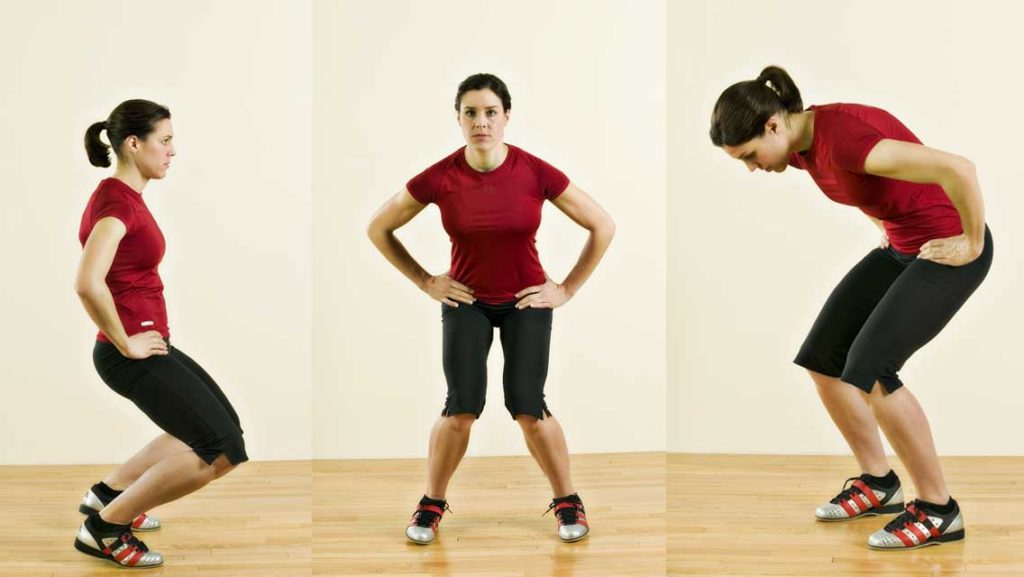
Mistake No. 1: Keep the knees behind the toes. The closer the shins are to vertical, the less stress on the knee joint.
Mistake No. 2: Knock-knees; tense your glutes to help keep your knees in line.
Mistake No. 3: Look forward or slightly up and avoid rounding your back during a squat. For safety, maintain normal curvature of the spine.
Pavel Tsatsouline Squat
As a way of programming better form, try this doorway-assisted squat. To begin, stand in a doorway, grasp the jambs and rock back.
You won’t use the doorway to support all your weight – just hold it enough to maintain your form and balance so that you don’t fall backward. Keep your knees and feet pointed in the same direction; you’ll find your most comfortable position through trial and error, but be sure the toes do not point inward. Keep your heels planted firmly on the ground.
Beginners should start with a half-squat and gradually deepen their range of motion. Your shins should remain vertical throughout the entire movement. “Don’t let your knees slip forward at all,” says Tsatsouline. “Pretend your shins are stuck in cement or that you’re wearing ski boots.”
Be patient: It may take weeks of daily practice to work up to the range of motion of a full squat.
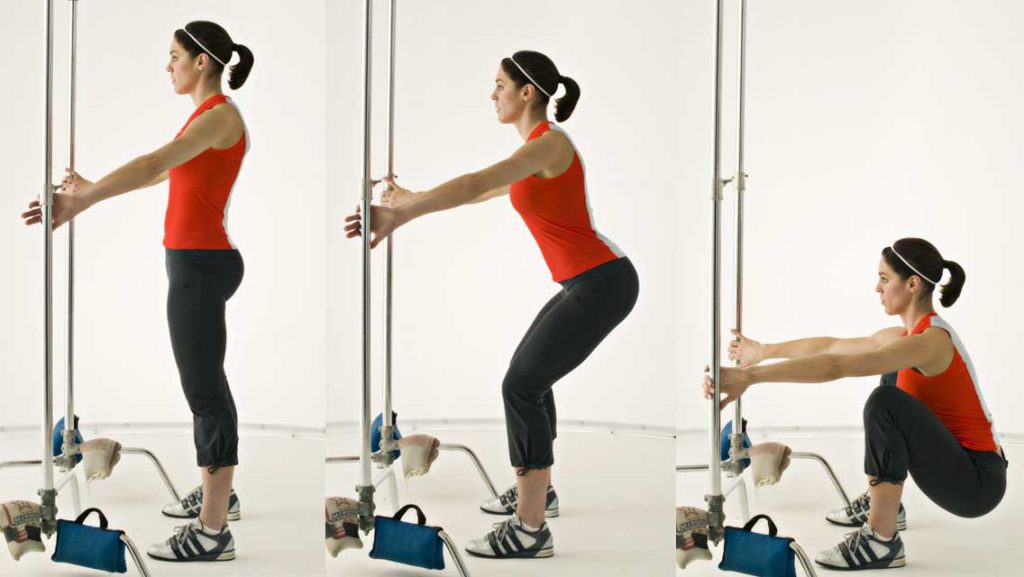
1. Stand in a doorway, grasp the jambs and rock back. Your toes should come off the ground slightly.
2. Evenly distributing the weight between your feet, slowly lower your body, keeping your spine arched naturally and your shins vertical.
3. Keep leaning back until your thighs are parallel with the ground, sliding your hands down the doorjambs as you lower your weight.
4. If you feel ready to move past the body position in No. 3, keep lowering your butt until it’s nearly resting on your heels. Then, slowly return to the start position, holding your form. This is a full squat.
Awareness
“Whenever a muscle contracts, it irradiates a ‘nerve force’ around it that increases the intensity of the neighboring muscles’ contractions,” Tsatsouline says. This tension-generating technique is the key to getting stronger.
Try gripping the floor with your toes just before you ascend from the squat, for example. You will find your task becomes easier, because you’ve recruited tension from other muscles.
You can amplify this already-increased strength using “power breathing,” or the Valsalva maneuver – a technique long known to bodybuilders and martial artists (don’t try this if you have a heart condition, high blood pressure, hernia or other medical condition). Breathe with your diaphragm, not your chest. After you inhale, compress the air in your belly by holding your breath for a second or two or by exhaling slowly and audibly through your pursed lips. This increase in abdominal pressure amplifies the power of your muscle contraction.
(See “BREAK IT DOWN: The Squat” for additional form techniques and variations.)
Pushups
For generations, everyone from basketball coaches to drill sergeants has used pushups as the path to upper-body strength and toughness. And for good reason: They’re a superb exercise for strengthening muscles in your chest, shoulders, arms, upper back and core. And with all the variations – fingertip, knuckle, knee, rear-elevated, one-arm, stability-ball, weighted, Hindu, clapping, handstand – there’s a level of difficulty that suits everyone, from the fitness newbie to elite athlete. Unfortunately, if done improperly, any variation can lead to injury. Tsatsouline recommends several breathing, flexing and form techniques that will dramatically improve your pushup power.
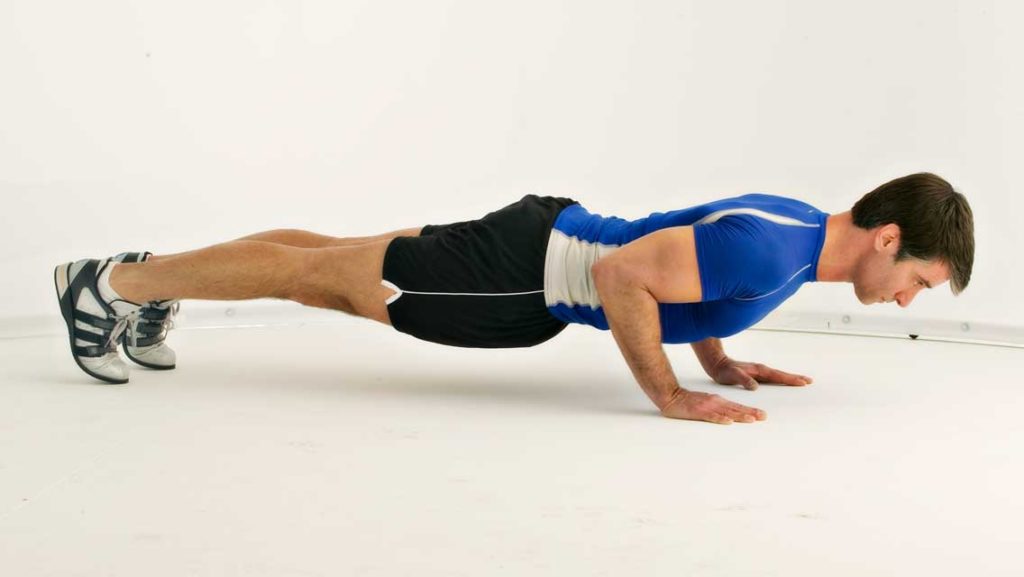
Common Pushup Mistakes
Most people do pushups with their fingers pointing inward and their elbows pointed away from their bodies – a form no-no, according to Tsatsouline. “If you do pushups with your elbows flared, you could blow your shoulder or elbow out,” he says.
Other common mistakes include shrugging the shoulders, bending from the waist with your rear in the air or swaying your back. The latter two are at odds with what Tsatsouline calls “high-tension training,” which requires you to flex your muscles just before the exercise to increase power by “borrowing” tension from muscles throughout the body.
Mistake No. 1:
- Splayed elbows. To keep tension on muscles, not joints, tuck your elbows by your sides and push from the armpits.
Mistake No. 2:

- Bum in the air, a classic form mistake. Good pushup form is simply maintaining good standing posture.
Mistake No. 3:
- A swayback means you aren’t engaging your core or your legs.
- A second form mistake here is scrunched-up shoulders.
(Also see, “Are You Making These Common Pushup Mistakes?” to learn how to nail the setup and perform your pushup correctly.)
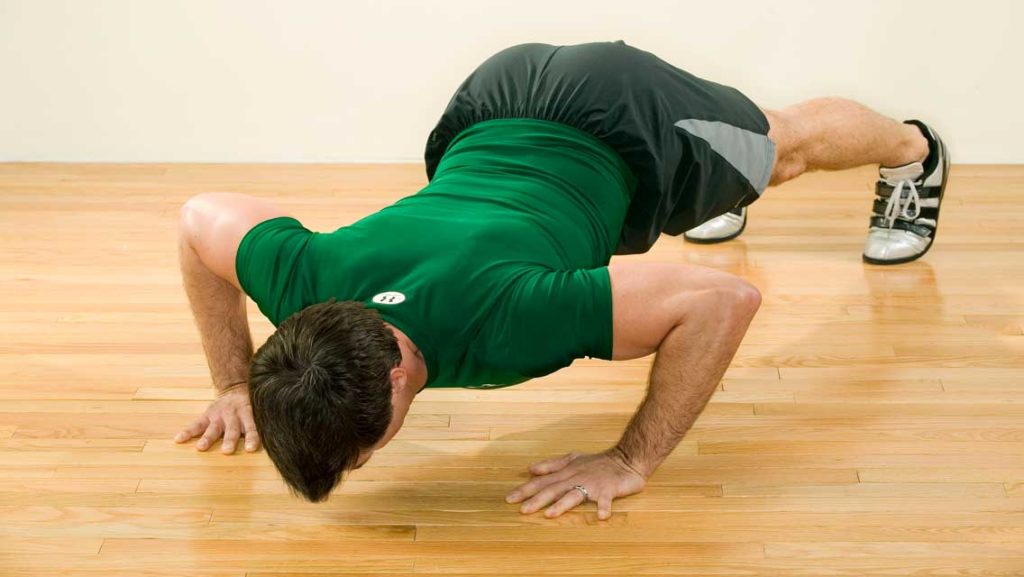
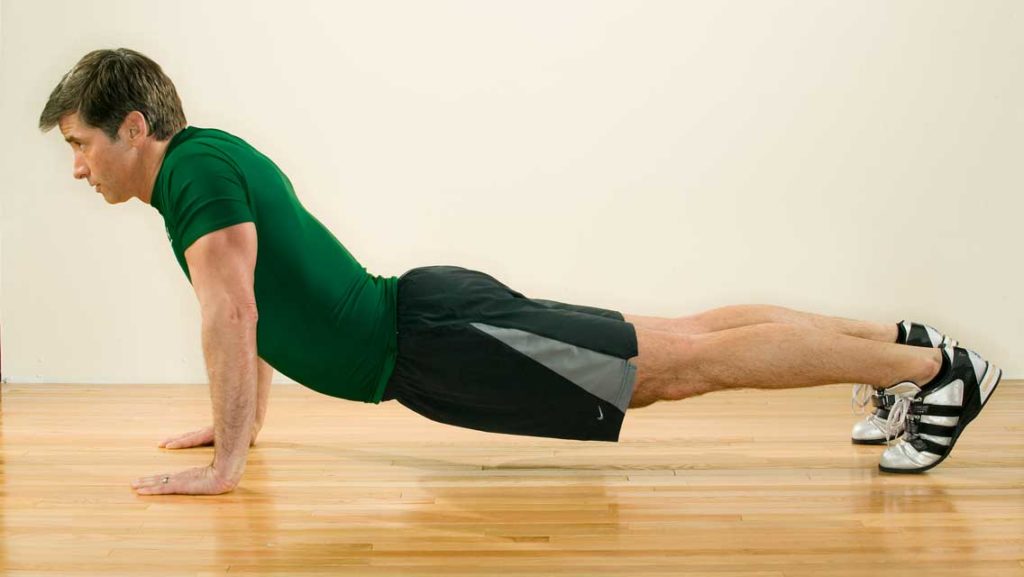
Pavel Tsatsouline Pushup
Place your hands even with your sternum, middle fingers pointing straight forward and elbows tucked close to your body. Your body should make a straight, rigid line. “At the top of the pushup, you’ll feel slightly unstable, like you’re almost teetering over,” says Tsatsouline. “That’s the way you’re supposed to feel.”
And ignore the conventional advice about staying relaxed while you exercise; Tsatsouline says you can relax after you finish the reps. Before you begin pushing away from the floor, tense the muscles along your ribs, called the latissimus dorsi and serratus anterior, and push from the armpits – not the shoulders.
Throughout the entire exercise, continue to draw your shoulders down, away from your ears, and maintain a flat back by imagining that you’re squeezing a quarter between your shoulder blades.
As doing pushups becomes easier, you can increase the difficulty by elevating your legs on a ball or platform or trying a one-armed version.
1. From a kneeling position, place both hands on the floor, even with your sternum. Check that your middle fingers are pointing straight forward, and then, keeping your elbows close to your body and slightly tucking the hips, come into a plank position.

2. Slowly lower your body. Your head should remain neutral throughout the exercise, falling in line with the rest of your body. Fight the urge to tuck or jut your chin.

3. When your chest almost touches your hands, grip the floor with your fingers until your knuckles begin to go white and — concentrating on pushing from your armpits, not your shoulders — slowly return to the start position. (Relax your hands again on your way back down.)
Awareness:
Start by doing five regular pushups the way you usually do them. Rest briefly, then do another five, this time focusing on stability, slow movement and recruiting the power of your entire body. Grip the floor with your fingertips. Use just enough tension that your knuckles start to turn white (relax your knuckles as you descend). As you grip harder, you’ll feel muscular tension (and strength) flowing into the forearms, upper arms, shoulders and armpits. Notice the difference in the energy and power you feel.
(Fine-tune your pushup form even more at “BREAK IT DOWN: The Pushup“.)
Basics Made Better
By now, you’re probably seeing a pattern. As with the squat, Tsatsouline’s pushup recruits and radiates strength through strategic muscle tension. As we saw with the sit-up, strategic clenching and tightly controlled form helps maximize strength where it belongs and inhibits the work of “helper” muscles, whose help actually eats away at the effectiveness and safety of the exercise you’re trying to do.
These are the sorts of details and discernments that probably would have been lost on us back in grade school – even if someone had bothered to teach us. Of course, back then we thought we knew everything. And now … well, now we know better.
This article has been updated and originally appeared as “Back to Basics” in the April 2007 issue of Experience Life.


Comments (0)