

Taking time to deliberately rest our minds and bodies rarely makes it onto most people’s to-do lists. And yet, when we consider the benefits of deep relaxation, most of us can’t afford not to make it a priority.
Enter restorative yoga.
“Restorative yoga invites people to come into a place of stillness and quiet,” says psychologist and yoga-therapist educator Gail Parker, PhD, author of Restorative Yoga for Ethnic and Race-Based Stress and Trauma. “You use props to support your body in holding postures for an extended period of time so you can come into a deep level of relaxation.”
Those bolsters, blankets, blocks, and other supportive tools help minimize discomfort and resistance in poses, which are then often held for long periods of time — up to 20 minutes.
It’s common to hear the terms “restorative” and “yin” used interchangeably, or for yin yoga to get tucked under a bigger “restorative” umbrella, but the two slow-paced styles are actually separate approaches. Yin yoga targets connective tissue to improve fascial health, while the goal of restorative yoga is relaxation.
“The relaxation response is a real physical response. When we access it, it’s a still, quiet practice without using any muscles or doing any work,” explains Parker. “You are stimulating the parasympathetic nervous system, and when that happens, blood pressure drops, heart rate slows, breathing becomes more efficient, and brain waves slow. That’s where health resides, restoration occurs, and growth occurs.”
Practicing restorative yoga is not just about the time you spend in a class; it’s about finding calm in your everyday life, no matter your fitness level, age, or occupation. As Tory Schaefer, Life Time’s national director of yoga operations, succinctly puts it: “Restorative yoga is really a self-love practice.”
Here, our experts share their tips for getting the most out of a restorative practice.
“Take the Easy Way Out”
That’s what Parker tells her students when they’re setting up in her class. Unlike other yoga styles that require you to use minimal support to find a pose — leaning into resistance to build strength and flexibility — restorative yoga should feel comfy from the start.
“In restorative yoga, use as many props as possible to feel good,” says Schaefer.
Focus on Your Breath
Once you get comfortable, says Schaefer, finding your breath will come naturally — and allow you to relax even further. Inhale and exhale fully and mindfully, through your nose, and note if your mind starts to become more active as your body settles down. (Give one of these six breathing exercises a try.)
“When we slow down as much as we do in restorative yoga, it’s common for our minds to ramp up,” he explains. “I believe all yoga is here to help us become better partners with the reactions of our minds. Anytime you recognize your mind has gone somewhere, you can bring yourself back to your breath.”
Expand Your Practice
With time, you may find that your practice begins to spill off the mat and shape your day-to-day mindset.
“Your mind is where you’ll find growth in a practice like this,” says Schaefer. You might notice that you’re less reactive, calmer, more creative in your approaches to various tasks and responsibilities, and generally more content.
“Learning to experience safety in stillness is very powerful,” says Parker.
3 Poses to Try
If you’re new to restorative yoga, attend classes to get a feel for the poses, pacing, and mindset, Parker suggests. In time, you’ll be able to cultivate a practice on your own.
Parker and Schaefer share their favorite at-home poses below. In addition to a yoga mat, you’ll want two blankets and a bolster or firm cushion.
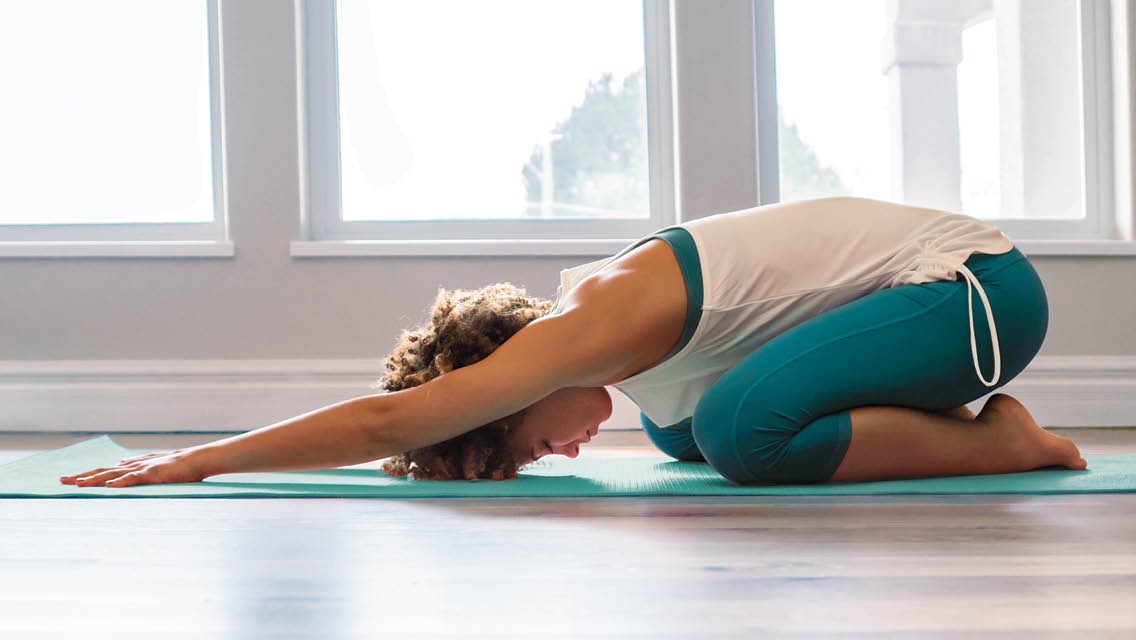
Supported Child’s Pose (Supta Balasana)

- Place your bolster lengthwise on your mat, then fold or loosely roll a blanket to stack on top of the bolster.
- Kneel behind your bolster and place a folded blanket on top of your calves. (Add another blanket at your ankles for even more support.)
- With knees wide, fold forward to rest your torso and one cheek on the bolster. Relax your arms at your sides.
- After at least five minutes, turn your head to the other side and rest for the same period of time.
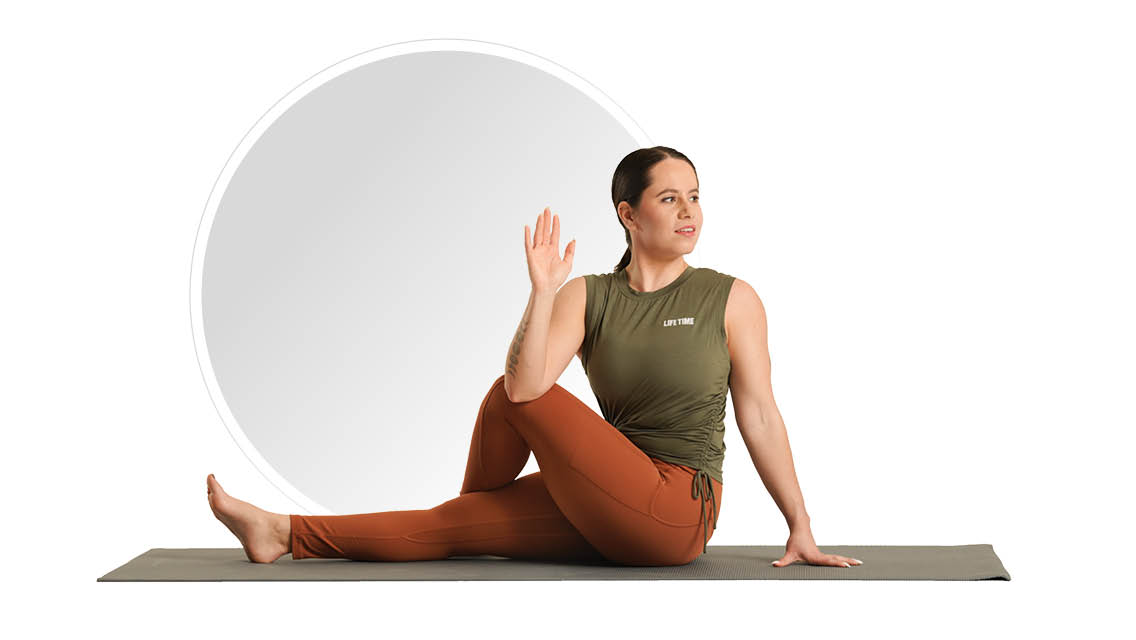
Supported Spinal Twist (Supta Matsyendrasana)

- Place a bolster or firm cushion on the left side of your mat, and lie on your back. (For extra support, place a folded blanket under your head to serve as a pillow.)
- Keeping your upper body still and your shoulders on the floor, slowly cross your right leg over your body and rest it on the bolster. Relax into the gentle twist, with your right hand resting on the side of your body or at your side.
- After at least five minutes, switch sides and rest for the same period of time.
Supported Reclined Butterfly (Supta Baddha Konasana)

- Place a folded blanket on each side of your mat near the bottom. Lie on your back and bring the soles of your feet together.
- Allow your knees to fall open to the sides, and adjust the blankets so that your legs rest comfortably on them. Rest your arms at your sides.
- Relax in this position for at least five minutes.
You can also try this pose with additional bolstering under your head and shoulders: Place a yoga block horizontally at the top edge of your mat and create a ramp with your bolster by placing one end on the block and the other end on your mat. Sit directly in front of the bolster and lie back before positioning your feet and legs.
2 More Poses to Try
Supported Legs Up the Wall (Viparita Karani)
- Place your mat facing an empty wall. Place a folded blanket on your mat about three feet from the wall. This will go under your head and neck as a pillow.
- Fold a second blanket to create a firm cushion and place it about a foot from the wall.
- Set yourself up so that your head is on the first blanket and your lower back and sacrum rest on the second blanket.
- Then swing your legs up against the wall. Your sitting bones should slightly roll off the edge of the blanket to keep your pelvis neutral. Your hamstrings should feel comfortable; if you feel a big stretch in the backs of your legs, try moving farther away from the wall.
Supported Corpse Pose (Savasana)
- Place a folded blanket on your mat to serve as a pillow.
- Lying on your mat, position your bolster under your knees, allowing your legs to drape over the bolster. Let your arms relax out to your sides with palms facing up.
- You can cover yourself with a second blanket if you prefer.
(See “How to Do Savasana” for more on this restorative pose.)
This article originally appeared as “Peaceful Practice” in the March 2022 issue of Experience Life.


Comments (0)