


Explore this workout:
The Warm-Up ⋅ The Kettlebell Workout
To see all the moves check out The 20-Minute Kettlebell Workout (Video).
When Jenn D’Ambrosio showed up for her first kettlebell class last March, she was already pretty fit from lifting weights and playing sports. But D’Ambrosio (who is a physical-education teacher and basketball coach) was shocked at how much swinging a kettlebell elevated her heart rate. “The first session was really intense,” says the Chicago resident. “I didn’t realize how much of a cardio workout I’d get out of it.”
What surprised D’Ambrosio even more were the results. After three months of kettlebell training, she noticed major improvements not just in her physique, but also in her basketball game. “I can play a lot longer than I could before, my jumping has improved, and I’m more powerful on the court,” says D’Ambrosio. “Using kettlebells has really helped with explosive movement.”
To understand the benefits of a kettlebell workout, it’s handy to know something about the weight’s history. These uniquely shaped weights date back to ancient Greece and then to 18th-century Russia, where they were used as counterweights to measure grains and other goods. At Russian market fairs, vendors started swinging and lifting these kettlebells to show off their strength in movements mimicking farm work — from pitching hay to shoveling manure. These displays of power developed into a sport in the 1940s and were popularized by the Soviet military for training in the 1960s.
Today’s established kettlebell movements, like their agrarian predecessors, engage the entire body for a holistic, functional workout.
Shaped like a cannonball with a handle, a kettlebell is weighted off-center compared with a dumbbell and extends beyond your hand, increasing the lever effect of the weight. Moving it requires both speed and strength — a combination that builds power, or the ability to contract one’s muscles rapidly. This makes many kettlebell exercises suitable for high-intensity interval training or other formats of cardiovascular exercise.
In recent years, kettlebells have become as common as free weights in most American gyms. And they are among the simplest training tools to use, says Fawn Friday, a Russian Kettlebell Certified instructor and personal trainer in St. Paul, Minn.
“What I like about kettlebells is that while there is skill involved, the skill required to use them is pretty low,” says Friday, who has worked with people of all fitness backgrounds, from athletic teens to sedentary older adults. “Most people catch on and can move safely the first time they use kettlebells.”
Ready to start swinging? Try this workout designed by Friday — a simple, effective routine that works your entire body with just one kettlebell.
This workout, designed by kettlebell coach Fawn Friday, uses one kettlebell for all exercises. Friday suggests starting with a weight that you can comfortably push-press above your head for 10 repetitions. (This ensures that you will be able to perform the kettlebell clean and press.) If you find that this weight is too easy for the other exercises in the circuit, feel free to use two different-size kettlebells. You can perform this workout up to three times a week.
Warm-Up
Perform two sets of each exercise, alternating between exercises.
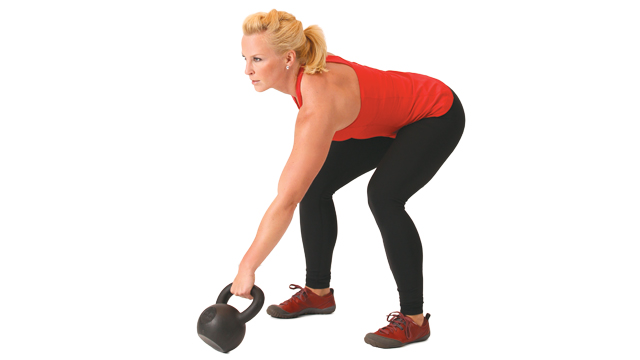
Deadlift
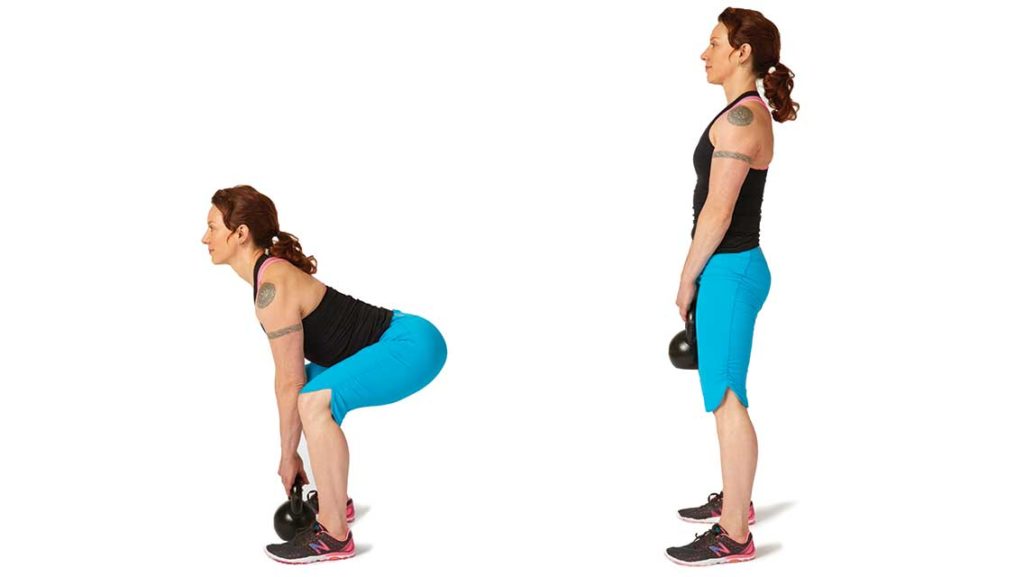
- Stand with your feet at shoulder width and the kettlebell positioned on the floor between your heels. Keeping your body weight in your heels, hinge at your hips to move them backward while lowering your hands to the kettlebell handle. Your back should stay flat during the entire exercise and your chest should be lifted.
- Grab the kettlebell with an overhand grip, making sure to keep your shoulders pulled back and lats engaged.
- Keeping your chest lifted, press your feet into the floor to extend your hips forward and straighten your legs. As you rise, keep your arms straight. Be sure your hips are fully extended at the top of the movement.
- Slowly lower the kettlebell to the floor by hinging at your hips and allowing your knees to bend as needed. Keep your back flat and your chest lifted.
- Reps: 10 to 15
Waiter’s Walk

- Using two hands, raise the kettlebell to the “rack” position on the left side of your body: thumb on your collarbone, left elbow at your side, and the kettlebell resting on the V-shape formed by your upper and lower arm. Hold the kettlebell with your left hand and drop your right hand to your side.
- Press the kettlebell overhead by straightening your left arm. Lock your elbow and keep your shoulder down in its socket. Keep your wrist straight.
- With the kettlebell locked out overhead, slowly walk forward, keeping your shoulders squared and hips level. Walk for 20 seconds to a minute. Turn around as needed to change directions, or walk in a circle.
- To switch sides, use your lats to “pull” the kettlebell back to the rack position. Then use both hands to switch the weight to the rack position on the right side.
The Kettlebell Circuit
Perform each exercise in this circuit for 30 seconds, followed by 20 seconds of rest. Perform the one-handed exercises on the left or right side until you complete the circuit. Then, repeat the circuit using the other hand for those exercises. Do the three-exercise circuit six times (three times using each hand), resting for one minute between each round.
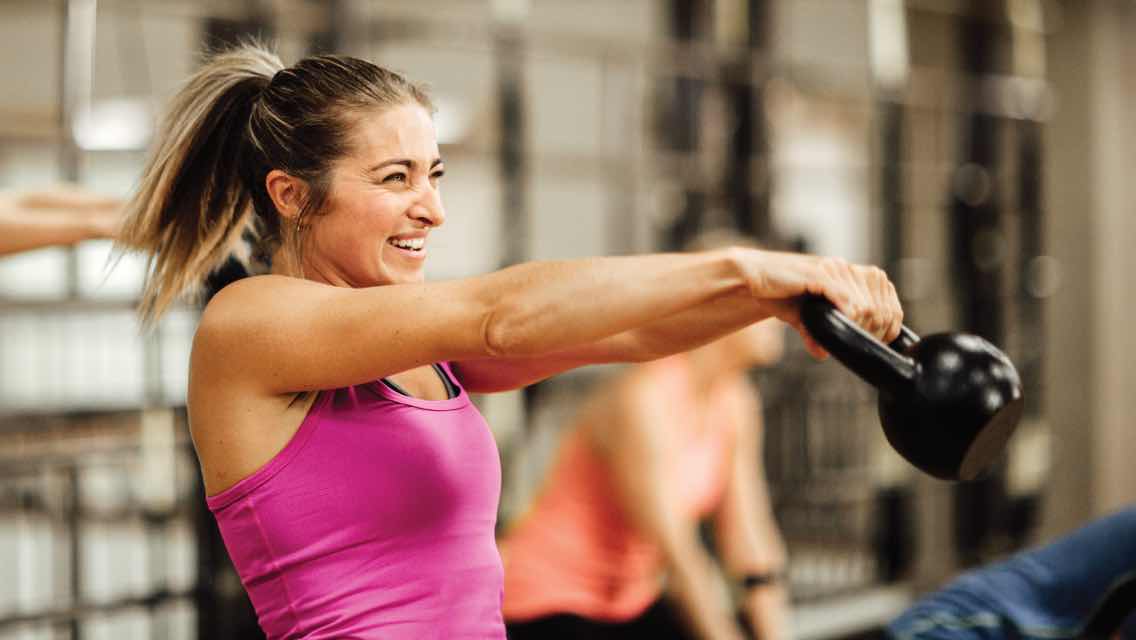
1. Two-Hand Swing
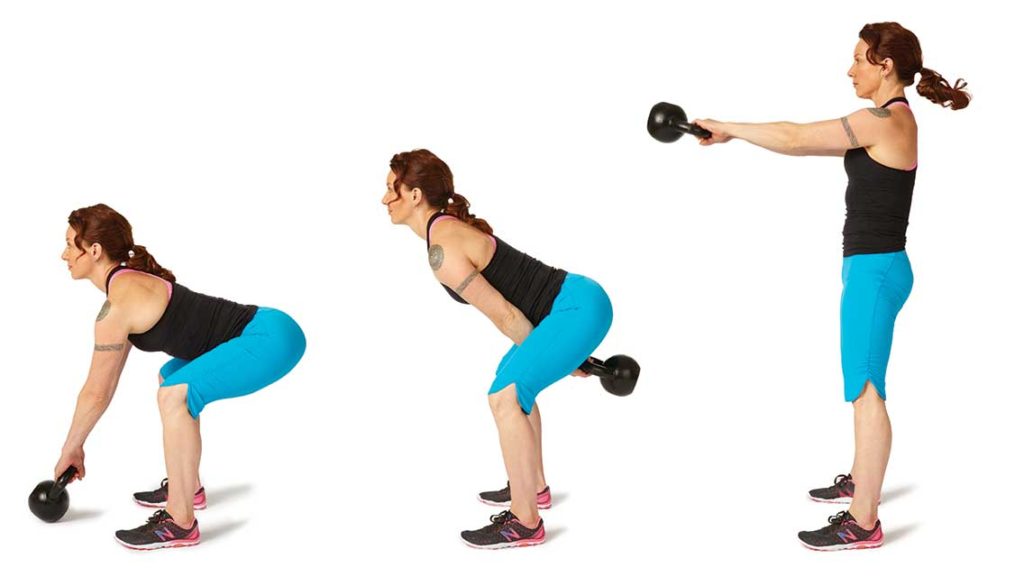
- Stand with feet slightly wider than shoulder width and the kettlebell on the floor about one foot in front of you. With your weight in your heels, hinge at your hips to move them backward while lowering your hands to the kettlebell handle. Your back should stay flat during the entire exercise and your chest should be lifted.
- Grab the kettlebell with an overhand grip.
- While still in a bent-over position, quickly snap or “hike” the kettlebell backward and between your legs. You should feel as if you are catching the force of the moving kettlebell with your hips.
- After hiking the kettlebell, reverse its direction by extending your hips forward, straightening your legs, and strongly contracting your glutes. This will swing the kettlebell out in front of you.
- When the kettlebell reaches the apex of the movement at roughly chest height, tense your abdominal muscles temporarily and force some air out. Also, tense your quadriceps to “pull your knees up” and lock your legs.
- As the kettlebell descends, don’t hold it up. Allow it to fall, then guide it back to the hiked position.
- Keep swinging in this manner until you have finished your set. Allow the kettlebell to slow to a stop and return it to the starting position.
For additional form tips, check out “BREAK IT DOWN: The Kettlebell Swing.”
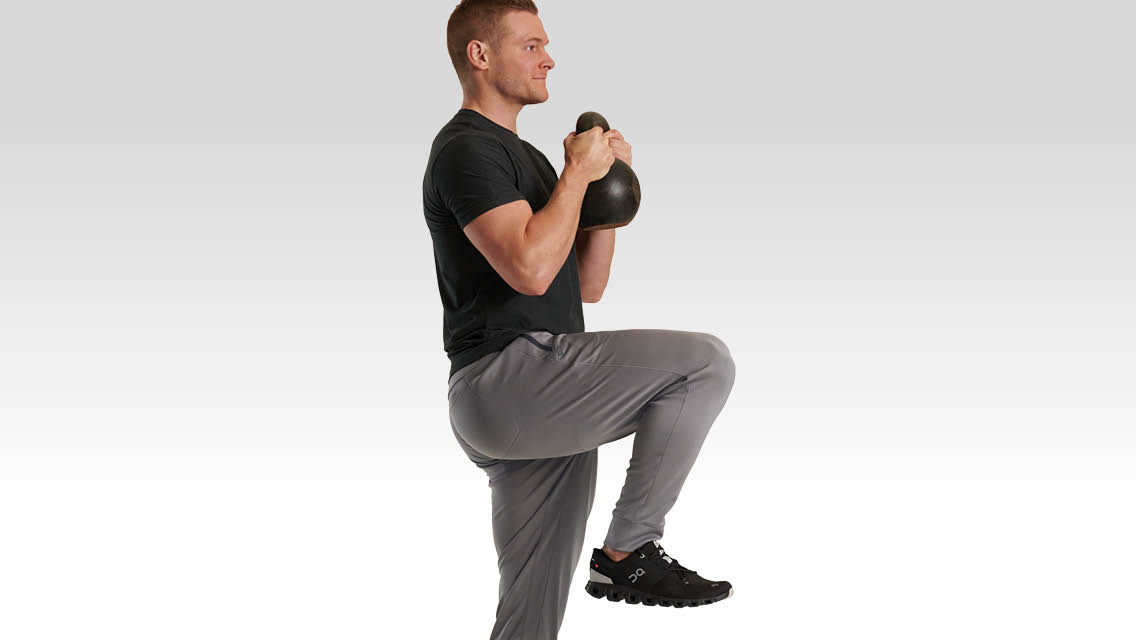
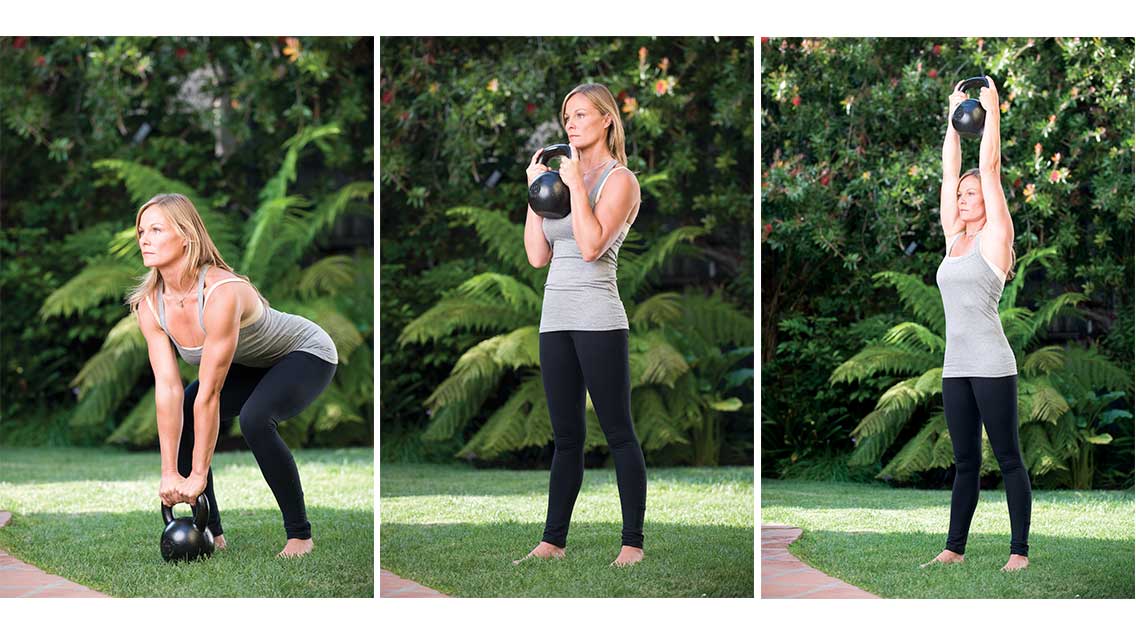
2. Clean and Press
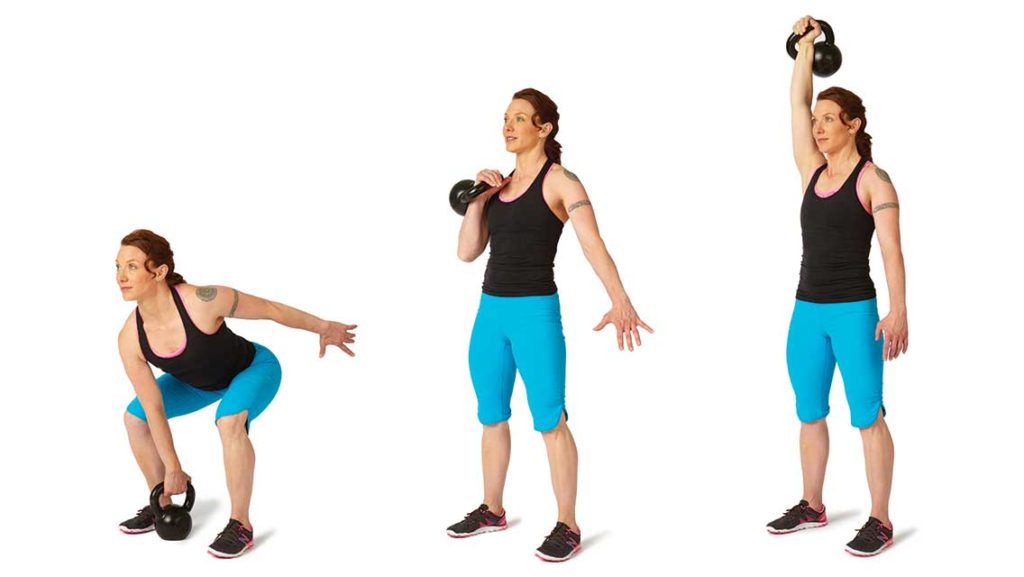 Clean and Press
- Stand with your feet at shoulder width and the kettlebell on the floor between them. Hinge at your hips while lowering your right hand to the kettlebell handle. Your left hand should extend out to your side. Your back should stay flat during the entire exercise and your chest should be lifted.
- Grab the kettlebell with an overhand grip.
- While still in a bent-over position, hike the kettlebell backward between your legs. You should feel as if you are catching the force of the moving kettlebell with your hips.
- Reverse the direction of the kettlebell by extending your hips, straightening your legs, and strongly contracting your glutes. Instead of swinging the kettlebell out in front of you, pull the kettlebell up the front of your body into the rack position. This is called “cleaning” the kettlebell. Keep your right elbow close to your rib cage as you do this move. At the top of the clean, your right palm should face inward, and the kettlebell should rest on the V-shape formed by your upper and lower arm.
- Press: From this rack position, press the kettlebell straight overhead and lock your elbow. Keep your shoulder down and your wrist straight. At the end of this movement, your upper arm should be close to your ear.
- Use your lats to pull the kettlebell back to the rack position in a controlled manner.
Hike and Re-Clean to Press
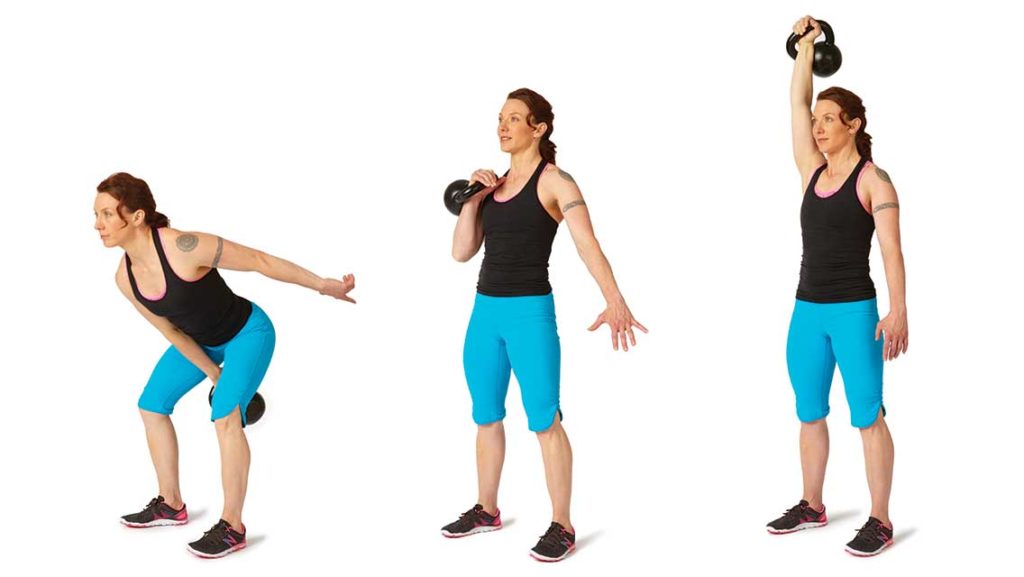
- From the rack position, hike the kettlebell behind you, between your legs. (See Circuit 1.) Do not throw the kettlebell forward; keep it close to your body.
- Catch the kettlebell with your hips, then reverse the motion and perform another clean followed by another press.
3. Reverse Lunge
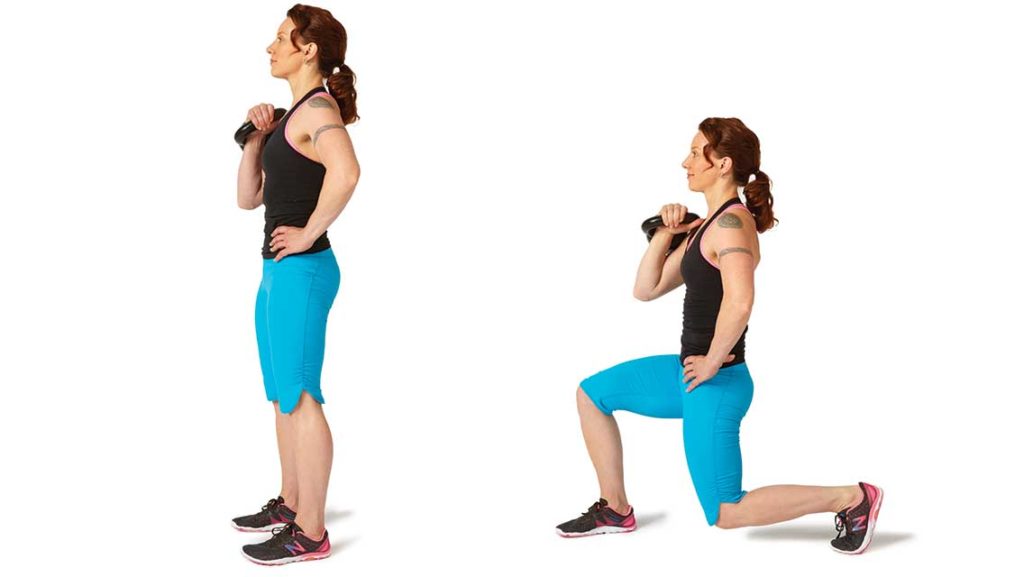
- Using your right hand, clean the kettlebell to the rack position. Adjust your feet to about the width of your hips.
- Keeping your body weight in your right heel, step your left foot backward into a lunge position, ending with your left knee about an inch above the ground. Make sure your right knee stays behind your toes.
- Push off with your right heel and straighten your right leg as you bring your left leg forward and return to standing.
Make It Harder: Hold the kettlebell overhead, as in the Waiter’s Walk.
(Also see, “3 Dynamic Kettlebell Exercises for Building Strength and Endurance” for more.)
It’s All In The Hinge
Kettlebell swings can seem intimidating, especially if you have a history of lower-back issues. According to kettlebell coach Fawn Friday, the key is mastering the hip hinge.
“Whenever you swing a kettlebell, you hinge at your hips while your spine stays netural. The hinge movement of the swing encourages the lifter to keep his or her core tight, almost intuitively,” says Friday.
Friday shares her hip-hinge hints:
- Practice deadlifts. Use a light weight until you master the movement pattern. (See “BREAK IT DOWN: The Deadlift” for form tips and variations.)
- Focus on keeping a neutral spine. If you’re not sure whether your spine is neutral, place a dowel on your back to make sure the surface is flat from the top of your head to your tailbone.
- Pay attention to where you feel the work; it should be mostly in your glutes and not in your lower back.
Watch all the moves at The 20-Minute Kettlebell Workout (Video).
This article originally appeared as “Get a Handle On It” in the December 2013 issue of Experience Life.


Comments (1)
[…] have an effect on anybody who performs repetitive grip-intensive actions, reminiscent of knitting, swinging kettlebells, and utilizing a […]