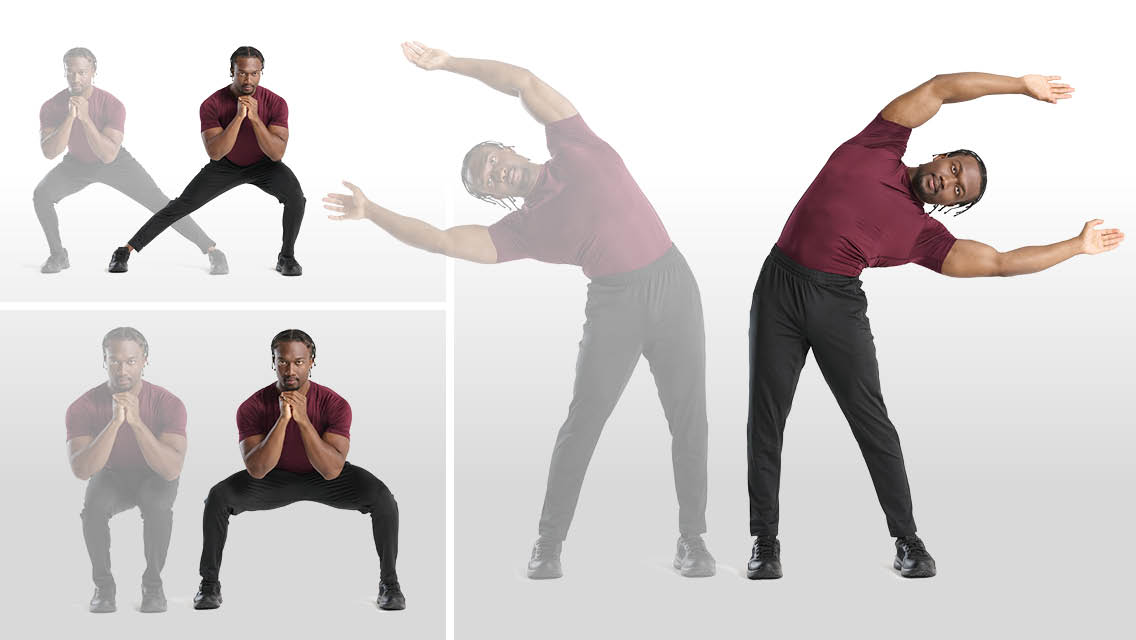
Whether you’ve just started exercising for the first time or you’re returning after a long period of inactivity, developing a strong foundation of movement quality and technique is crucial. And for that, no tool is better than your own body weight.
“Body-weight workouts emphasize the fundamental movement patterns you need in order to maintain pain-free, optimal posture and strength within your body,” says Anthony Slater, CSCS, director of performance at Core Performance in Los Angeles.
Body-weight workouts can help you prepare for a variety of demands, points out Krista Scott-Dixon, PhD, who runs the women’s weight-training Web site Stumptuous.com. “Both life and sport are unpredictable,” she says. “They happen in three dimensions, and they involve complex, multijoint movements. Learning to handle your own body weight as it moves through space doing complex motions ensures that you can move as efficiently, confidently and responsively as possible.”
Starting with body-weight workouts helps prevent injuries by developing stability and muscle coordination, as well as strengthening weaker areas before adding incremental weight. Try this introductory circuit workout designed by Scott-Dixon. It will rev your metabolism and build the kind of strength and confidence that very few gym rookies possess.
Body-Weight Circuits
Complete one full set of each exercise in Circuit 1 (squats, pick-ups, rows). Rest for three to five minutes, then repeat. You’ll complete Circuit 1 three times and then move on to Circuit 2.
Circuit 1
Minute 1: Bottom-Up Squats, 5 reps
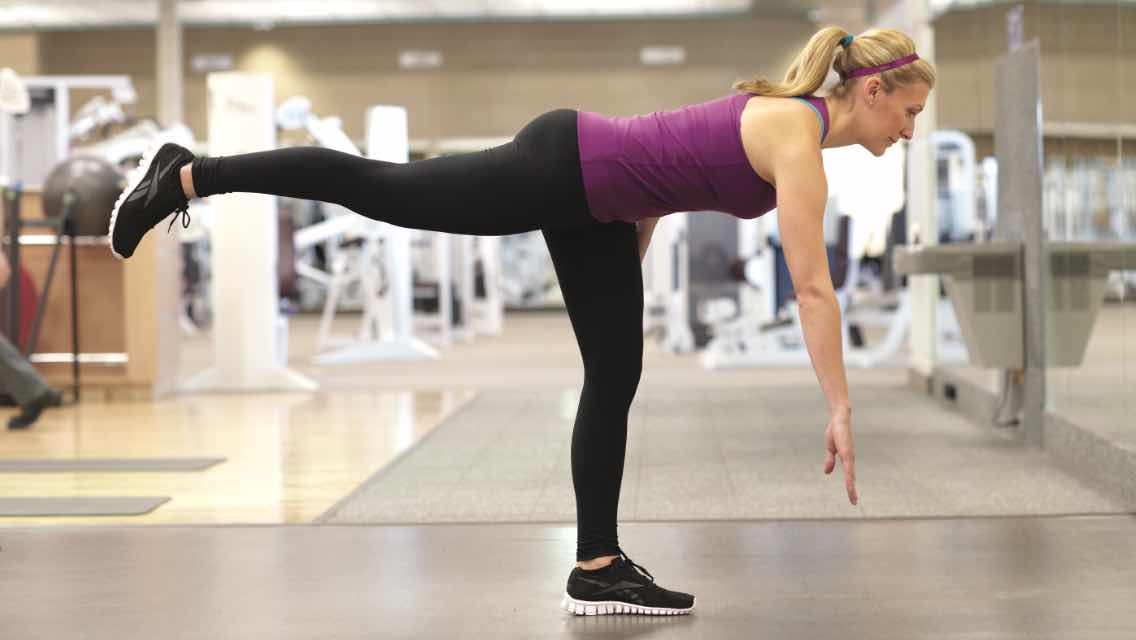
Minute 2: Golfer’s Pick-Ups, 5 per side
Minute 3: Railing Rows, 5 reps
Instructions: Set a timer for this circuit and start the reps of the next exercise at the top of each minute.
Bottom-Up Squats
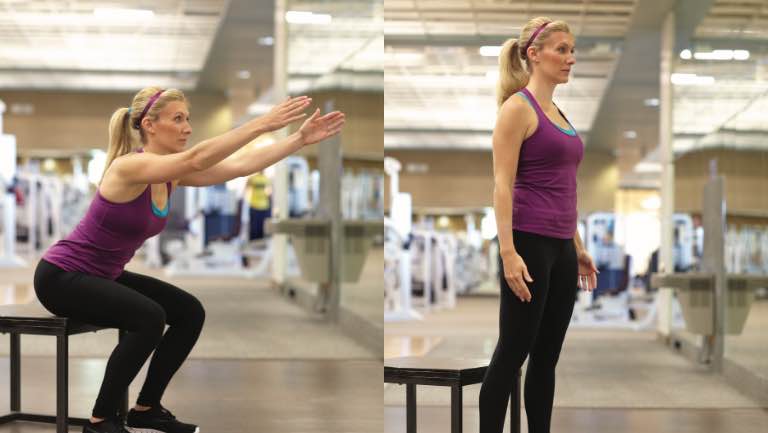
Basics: Squatting is one of the most fundamental human movements, useful for activities as simple as getting in and out of a chair. Bottom-up squats help strengthen your gluteals, hamstrings and quadriceps, as well as improve balance and stability.
• Sit down on a box, bench or step at a height where your legs are bent at 90 degrees and your feet are about shoulder-width apart. Sit tall through your spine. Look forward.
• Reach forward with your arms and drive your heels into the floor. Using the contraction of your glute muscles, stand up.
• Squat back down to almost sitting, pushing your butt backward as you descend.
Pointers:
• Make sure your knees are in line with your toes rather than tilting inward.
• Keep your spine in neutral alignment throughout the movement.
• Take a deep breath before standing up. Keep your chest “proud.”
• If you need a little extra help, use your hands to push off your knees on your way up. You can also use your hands to help yourself descend.
• To create a counterbalance, hold your arms out in front of you on your way up.
Make It Easier: Use a higher platform.
Make It Harder: Use a lower platform.
Golfer’s Pick-Ups
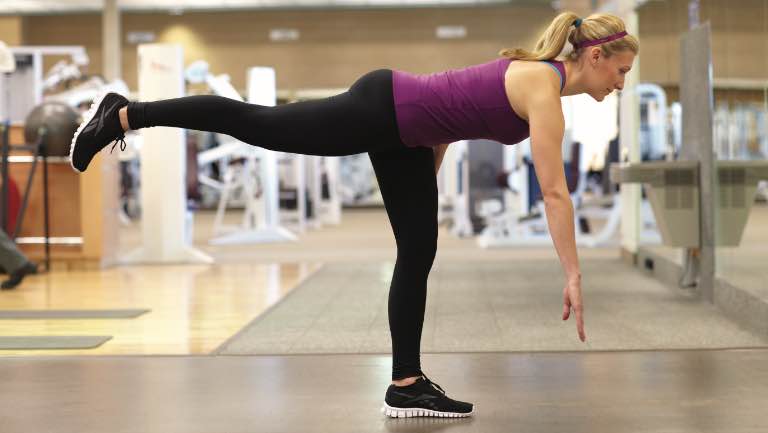
Basics: This exercise strengthens your hamstrings, glutes and lower back. It also stretches your hip flexors and strengthens your core.
• Starting from a standing position, shift your weight onto your left leg.
• Balancing on your left leg, tilt forward from your hips, lifting your right leg straight out behind you until your body is parallel to the floor.
• Reach for the floor with your right hand, as if picking up a golf ball.
• To come back up, contract your left butt muscle as you lower your right leg.
• Complete all reps on that side, then switch legs.
Pointers:
• Create a straight line from your head to your outstretched foot.
• Keep your hips parallel to the floor; don’t roll them to one side.
• Maintain the natural lumbar curve of your back. Don’t hunch over in order to extend farther.
• Rest your same-side hand on your front leg if needed.
Make It Easier: Don’t tilt over quite so far.
Make It Harder: Tilt your torso farther forward and raise your back leg even higher.
Circuit 2
Minute 1: Bear Crawl, 10 steps on either side (1 leg + 1 arm plant = 1 step)
Minute 2: Assisted Squat-to-Muscle-Up, 5 reps
Minute 3: Assisted Pushup, 5 reps, then hold the plank position for the remainder of one minute (unless otherwise indicated).
Instructions: Do this circuit three times, again starting a new exercise at the top of each minute. Rest for the remainder of each minute (unless otherwise indicated).
Bear Crawl
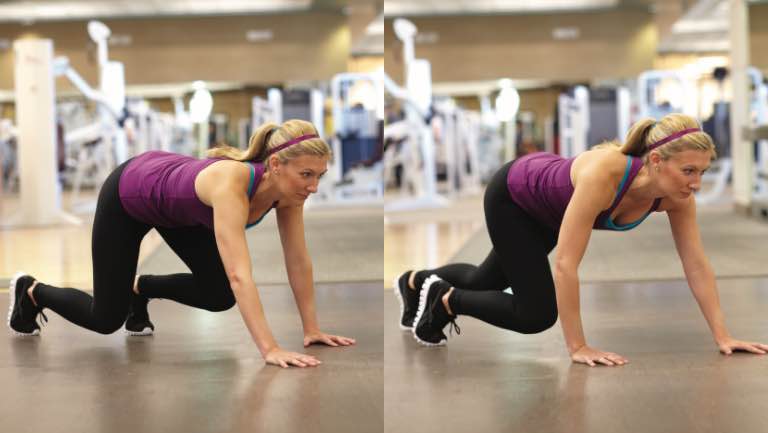
Basics: This modified crawling exercise not only strengthens your chest, arms and legs, but also stretches your hips and improves shoulder-girdle stabilization.
• Drop to your hands and knees with both hands on the floor in front of you. Then, lift your knees so that you’re balanced on your hands and feet, with your hips nearly even with your shoulders.
• Keeping your back and arms straight, move your left foot and right hand forward about 6 to 8 inches.
• Next, move your right foot and left hand forward.
Pointers:
• Your torso should be parallel to the floor (rather than in an inverted V with hips higher than shoulders).
Make It Easier: Perform the exercise more quickly.
Make It Harder: Slow the movement down. To begin, see if you can get each step to take at least five seconds. Once this is comfortable, slow down even further, working toward each step taking at least 10 seconds. You can also try bear crawling up a hill or staircase, or going backward.
Assisted Squat-to-Muscle-Up
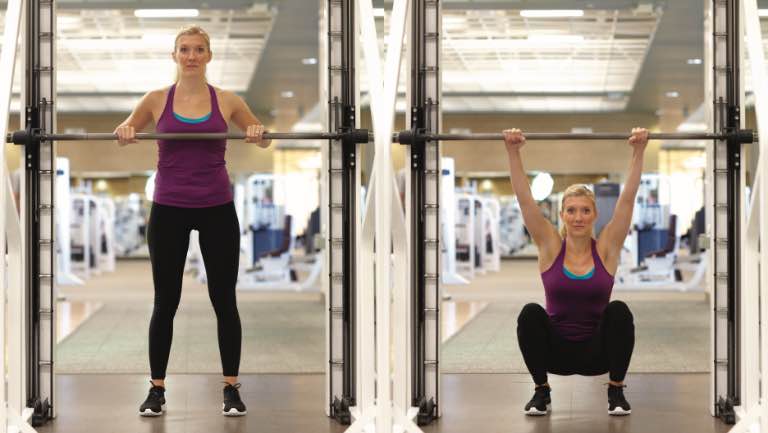
Basics: This full-body exercise uses your strongest muscles for combined squatting, pulling and pushing motions.
• Set up a bar at about chest height. If you don’t have access to a bar, you can use a countertop.
• Start from a standing position while holding on to the bar or counter edge with your palms facing down. Sit back and down as far as you can go.
• Drive through your heels while you pull yourself back up with your arms.
• Once you’re standing, jump and push yourself up to a straight-arm position above the bar or counter.
• Using your arms, slowly lower yourself under control to the starting position.
Pointers:
• In the second step, make sure you’re sitting down and back. Ideally, your hips should be below your knees.
• You should feel your hips and glutes working with this exercise. To increase hip and glute involvement, step a little wider and turn your toes out more.
Make It Easier: Let your arms do more work during the squat ascent.
Make It Harder: Once your hip mobility improves, sit back even farther in the second step. Also, once you can do the whole movement smoothly and continuously, go faster.
Railing Rows
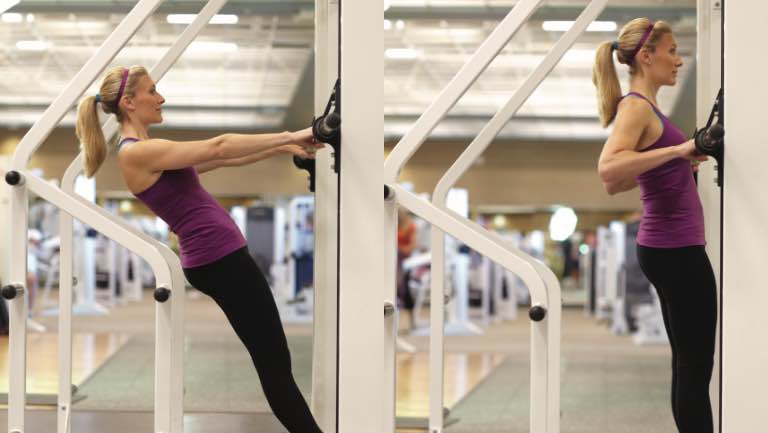
Basics: This exercise helps strengthen your back and arms. Set a bar in a power cage or Smith machine to chest height. Or, you can use a vertical pole. At home, you can even use a door: Simply face the edge of the door, put one foot on each side, and hold both doorknobs (move your feet forward so your body is closer to horizontal).
• With your palms facing downward, grab the bar with your hands slightly wider than shoulder-width apart.
• Keeping your feet slightly in front of the bar, lean back and extend your arms. Keep your body straight and rigid, like a plank.
• Bend your arms at the elbow to pull yourself up toward the bar.
Pointers:
• Keep your body straight and rigid throughout the exercise.
• Focus on pulling your elbows back and your shoulder blades down and together on your way up.
Make It Easier: Move the bar or railing higher. (It should not, however, be higher than your head.)
Make It Harder: Use a lower bar, so that your body is closer to the floor.
Assisted Pushup
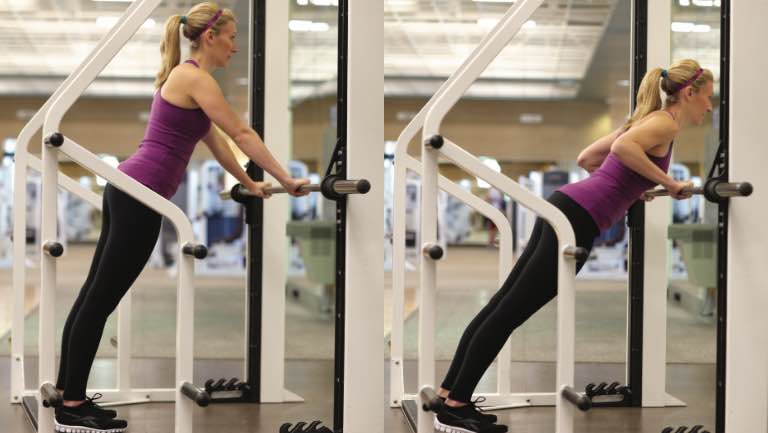
Basics: This exercise helps you stabilize the shoulder blades while developing the strength needed for a full pushup.
• Stand about 3 feet away from a bar, wall or counter.
• Place the palms of your hand on the bar or surface, keeping your arms straight and shoulder-width apart and your feet hip-width apart.
• Keeping your body straight and rigid like a plank, move your chest toward the bar or surface.
• Push yourself back to the start position.
After you’ve completed five reps, hold the plank position at the bottom of the pushup (step 3) against the bar, wall or counter for the remainder of the minute.
Pointers:
• Keep your body straight and rigid.
• Don’t let your hips sag.
• Look straight ahead, with your neck lengthened. Don’t let your chin jut out.
• Keep your elbows tucked by your sides instead of letting them flare out.
Make It Easier: Put your hands on a higher bar or surface, so you’re pushing less body weight. You can also adjust how far you are away from the wall. The more upright your body is, the easier the movement will be.
Make It Harder: Use a box or platform that is roughly hip height. Perform the exercise with your hands on the box and your feet back about 3 feet. Your body will be at a 45-degree angle in the bottom position. For a greater challenge, use a box that’s 12 to 15 inches high, or try pushing off the floor.
See all the moves in action at The Body-Weight Training Workout (Video).
