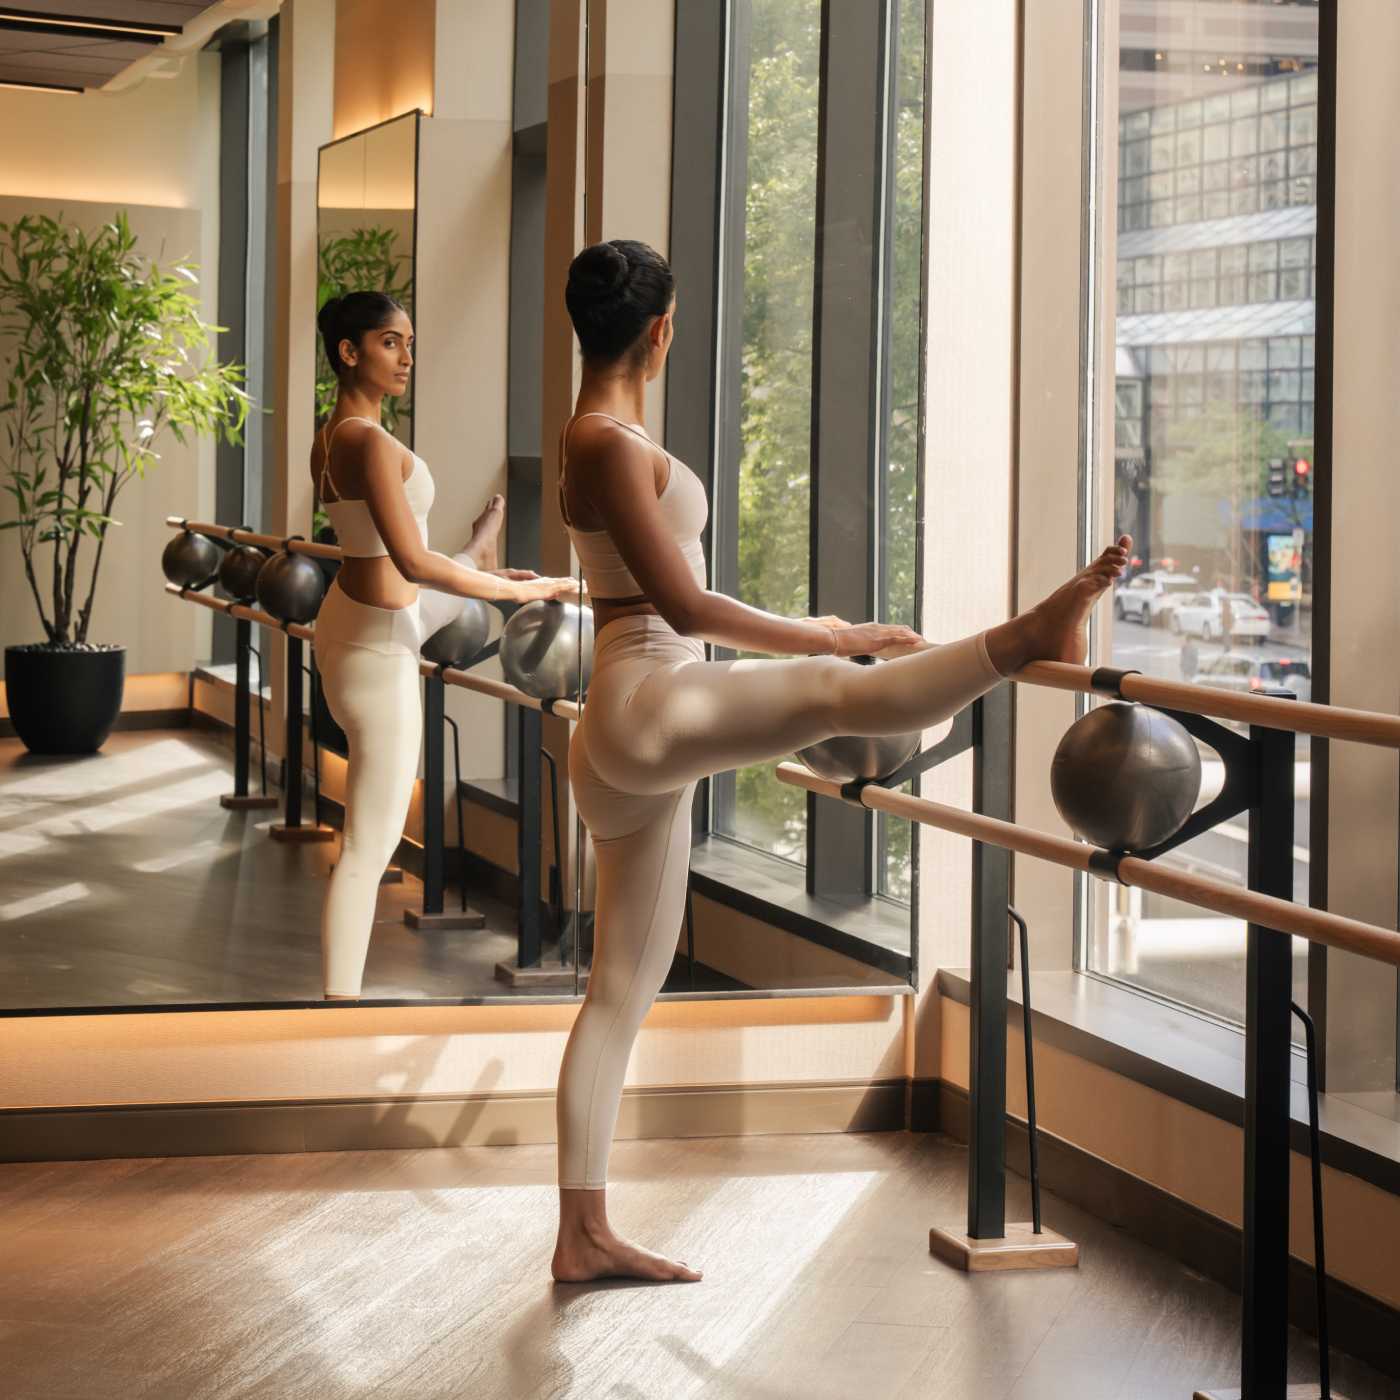
Improved posture. Better balance. Stronger core. These are just a few of the benefits of barre, an exercise format that has grown in popularity over the last decade. Instructors like Lillian Davis, studio leader and barre instructor at Life Time in Mason, Ohio, tout the many advantages of this format, including its low barrier to entry.
“Unlike other classes and formats that increase muscular strength, barre can be less intimidating because we do not use equipment like heavy dumbbells or barbells,” says Davis (@lillian.k.davis). “Barre is a full-body, low-impact workout that uses small isometric movements to target the deeper muscles and focus on strength and flexibility. It is a great addition for anyone of any fitness level or ability to add to their workout routine.
“Since barre focuses on small, isometric movements, we’re working muscles that you may not be targeting in other classes or programs,” she adds. “These exercises contribute to increased mobility and range of motion that are beneficial in your everyday life.”
To get an idea of what barre is like at Life Time, we asked Davis to demonstrate five exercises commonly performed in Life Barre classes.
1. Chair Pose Plié with Relevé
“Plié and relevé are ballet terms,” Davis explains. “A plié involves bending your knees into a squat position, and relevé involves lifting your heels so you’re standing on your toes. This move targets the glutes, inner thighs, hamstrings, core, ankles, and feet.”
- Start with your feet parallel and together, with both your hands resting on the bar.
- Grasp the bar as you start to lower into a seated position (plié), driving your knees toward the bar while squeezing your thighs together.
- At the bottom of your plié, lift both heels, then lower them back down (relevé).
- Return to your starting position by engaging your quads (the tops of your legs); avoid pulling yourself back up with your arms.
- Repeat as directed by your barre instructor.
2. First Position Plié
“First position in ballet involves standing with your heels together and toes turned slightly outward,” says Davis. “When you squat down in this position, you’ll work your glutes, hamstrings, core, ankles, and feet.”
- Start with your feet in first position with both hands placed gently on top of the bar. Relevé so your heels are lifted off the ground.
- Lower your tailbone toward your heels while focusing on making a diamond shape with your legs.
- When you’re at your lowest point, without compromising your upright position, slowly stand back up. Keep your heels raised throughout the entire movement.
- Note: Keep your weight in your legs and be sure not to pull on the bar.
- Repeat as directed by your barre instructor.
3. Wide Second Position Plié
“In ballet, second position refers to standing with your feet a little wider than hip width apart with your toes turned out,” says Davis. “In this position, you’ll feel the squat working slightly different parts of your glutes, hamstrings, core, ankles, and feet.”
- Start in second position with one side facing the bar. Rest the hand closest to the bar on top of the bar.
- Tuck your tailbone under as you lower into a squat. Focus on keeping your tailbone tucked and your shoulders directly over your hips.
- Slowly stand back up, still keeping your tailbone tucked and chest tall.
- As you reach the top, go into a relevé, rising onto your toes.
- Make it harder (optional): Engage your free arm as you move. Lower it as you squat down, then raise it over your head as you come back up.
- Repeat as directed by your barre instructor.
4. Water Ski Pulse
“This move is called the ‘water ski’ because the shape your body takes looks similar to that of a water skier (leaning back as they’re being pulled),” Davis explains. “As you hold this position and pulse at the bar, you’ll be working your glutes, quads, and arms.”
- Start with your feet in first position with both hands placed gently on top of the bar. Relevé so your heels are lifted off the ground.
- Lower your tailbone toward your heels while focusing on making a diamond shape with your legs.
- When you’re at your lowest point, without compromising your upright position, slowly stand back up. Keep your heels raised throughout the entire movement.
- Note: Keep your weight in your legs and be sure not to pull on the bar.
- Repeat as directed by your barre instructor.
5. Attitude Leg Lift
“This is another lower-body exercise you might see in Life Barre,” says Davis. “Here we’re working the inner thighs and quads.”
- Start in first position with one side facing the bar. Place the forearm of your arm closest to the bar on top of it.
- Step your leg that’s farthest from the bar out in front of you, then turn your knee slightly out so your inner thigh is facing up.
- Keeping slight bend in your knee and toes pointed, slowly lift your leg up and then lower it back down. Move slow and with control.
- Repeat as directed by your barre instructor.
Life Time offers four different Life Barre classes — to learn more and see which classes may be right for you, check out: “Which Barre Class Is Right For You?”